DIY: Lavender Soy Candles

I decided to get all James Bond on ya and slide one last craft post in before Christmas break.

candle6

I have no idea what this has to do with you, Mr. Bond, 007 sir, and I’m sorry for dragging you into it.

Okay so homemade candles. Have you ever done this before? This was my first time, and I’m just going to tell you, I was TERRIFIED. Why? Because I did all this research on how to make soy candles and everything was like, “melting temperature this and pouring temperature that and wax explosions this and car chases that.” So I did as any safe mother-to-be would do and ignored it all, melted some dang wax and ran in the other room to hide under the table.

(don’t tell social services)

Also, I hadn’t originally planned on doing a post on these, so some of these are iPhone photos and some are camera photos. Guess which ones are which!

(just kidding that’s a seriously lame game)

So, candle making. You won’t believe how easy it is.

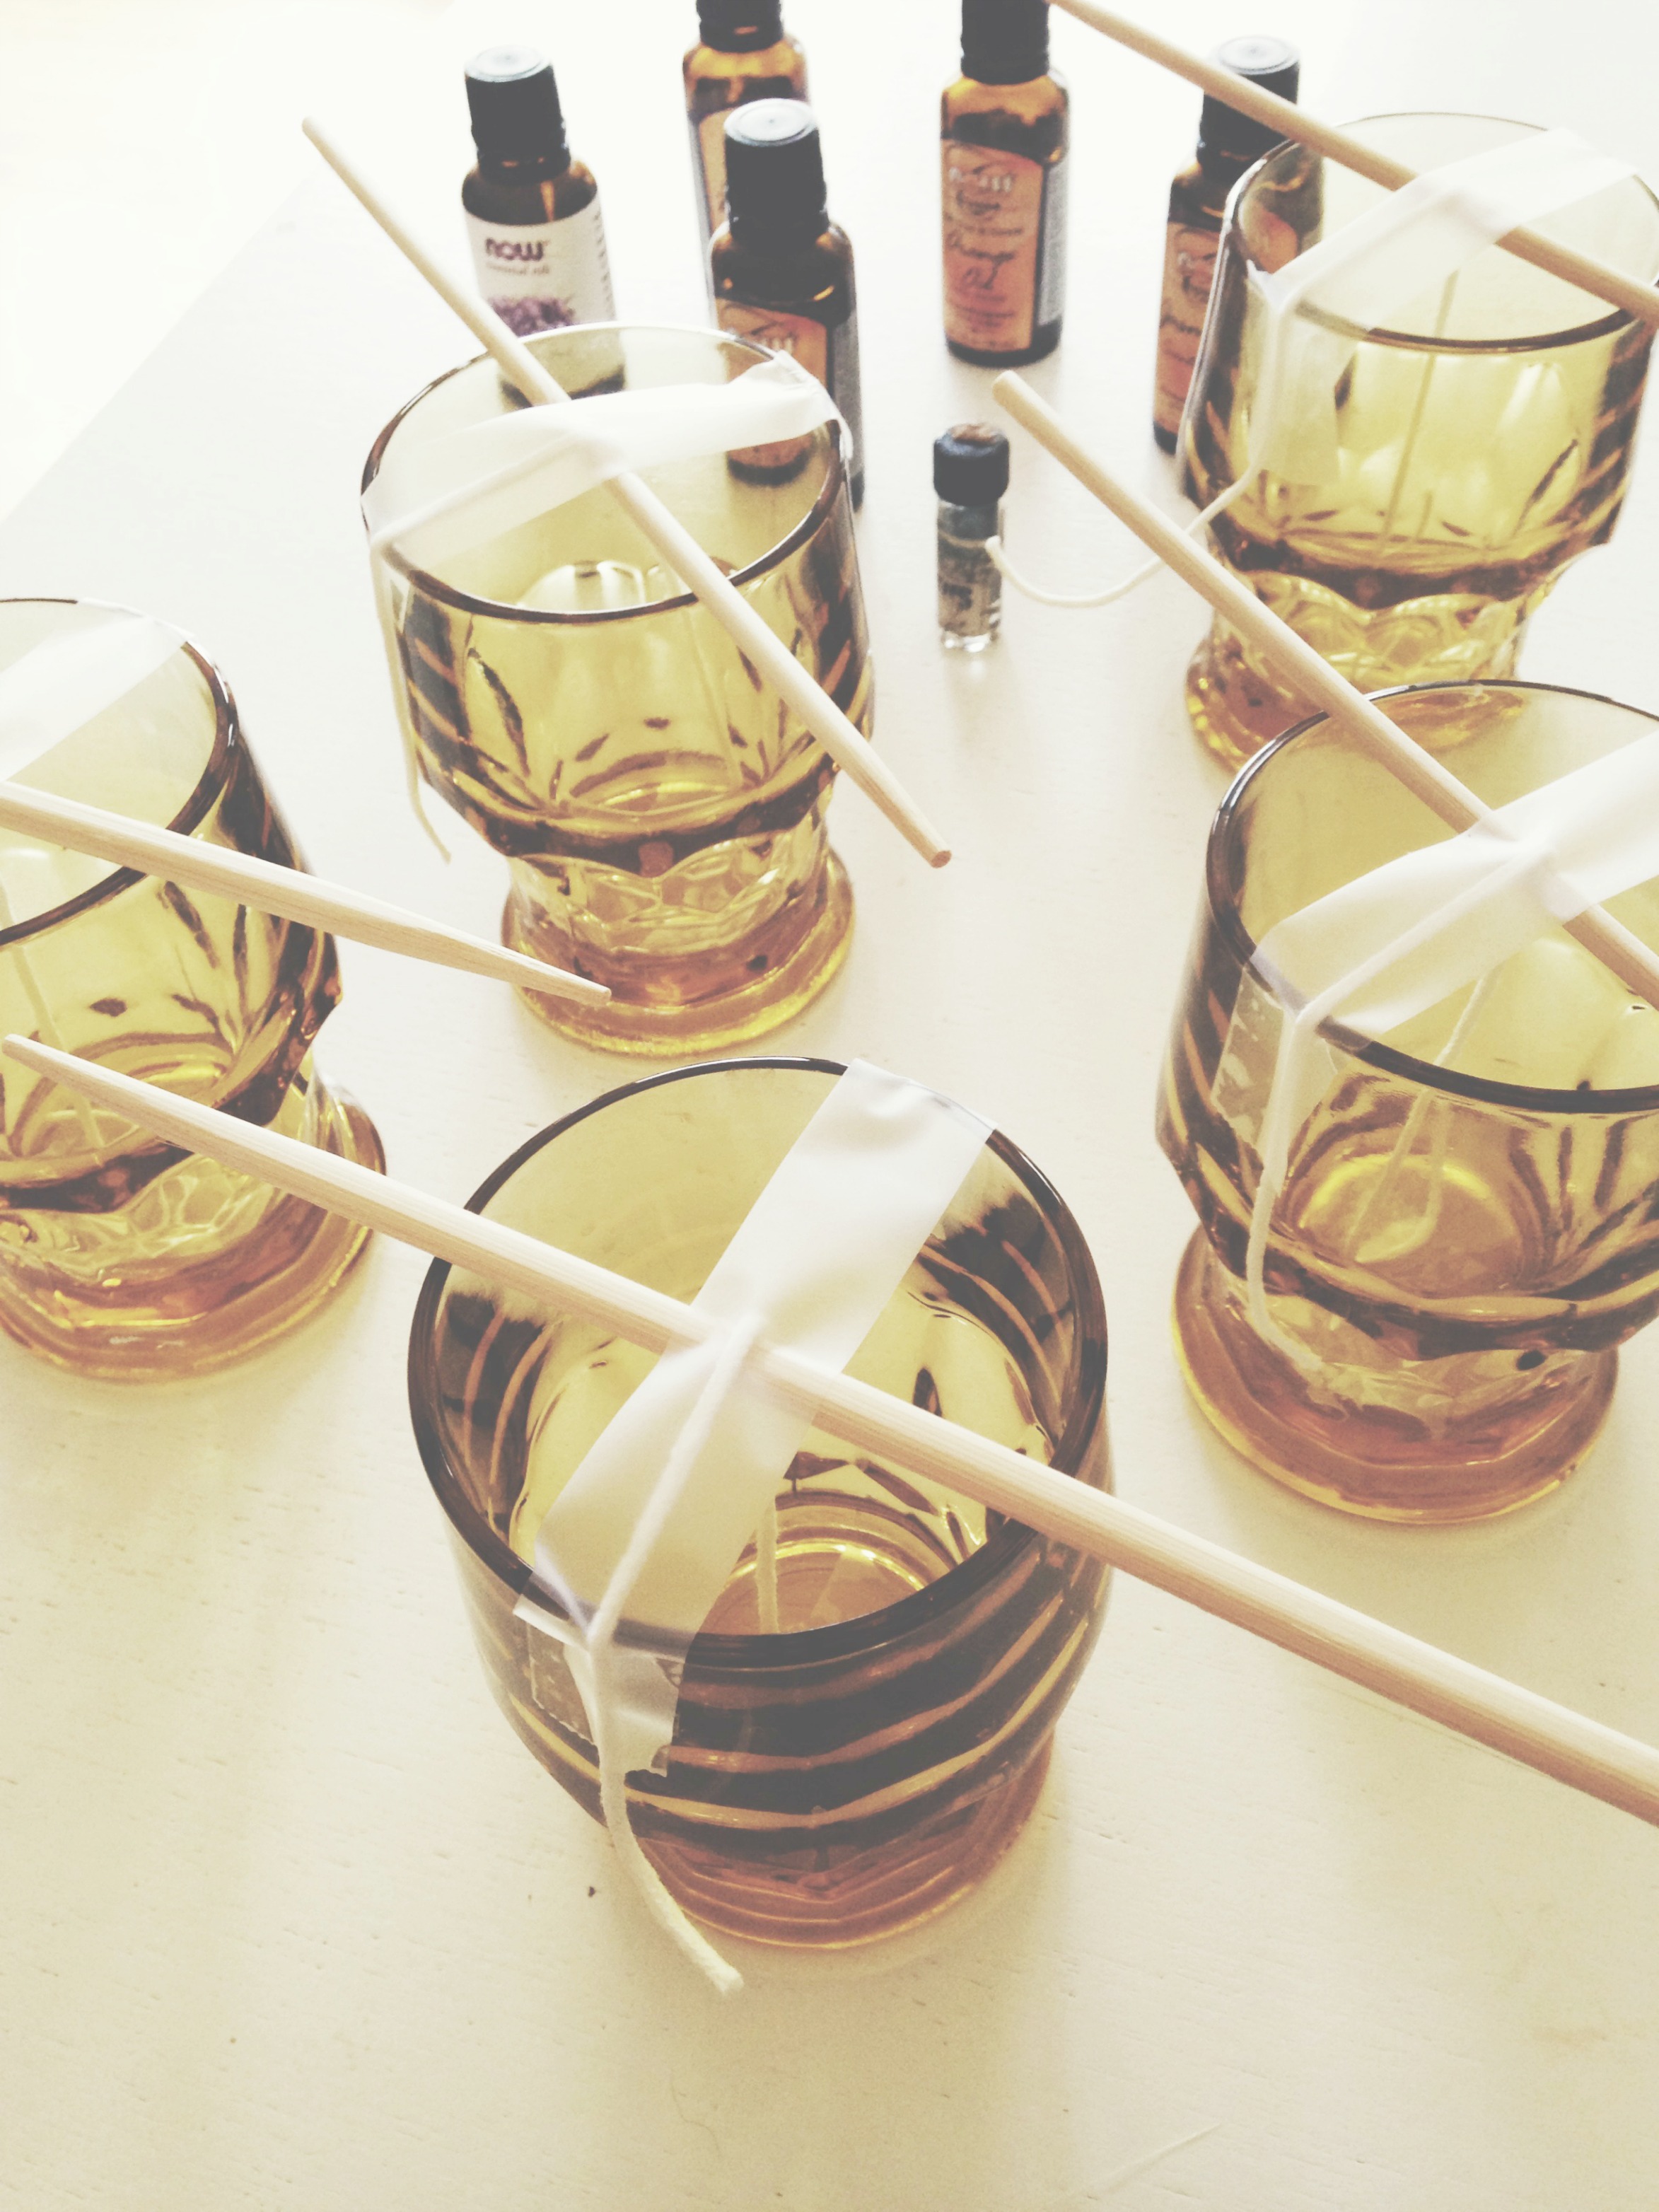
First of all, gather yo’ supplies: cute thrifted vintage glasses, jars or tins, microwavable soy wax (my bag didn’t say microwavable, hence the panic attack), wicks, and any essential oil that makes ya all tingly and rubberbandy.

Cut the wicks into 6-inch strips (or longer if your glass or tin is taller), and tape them to the bottom of each glass.

Use a chopstick to help guide your wick into place, to avoid any meltdowns.

Get it? Meltdown?

Like, melt? . . . wax?

Never mind.

Processed with VSCOcam with t1 preset

Do you accidentally hoard tons and tons of chopsticks when you order take-out food? Same here. Look at their new mission in life! Aw.

You’ll just lay the stick over the center of the glass and anchor the top part of the wick to it with tape, keeping it in place. It goes by fast, so you won’t get burned out.

Get it? Burned out?

Like, burn a candl – hmmm.

Processed with VSCOcam with t1 preset

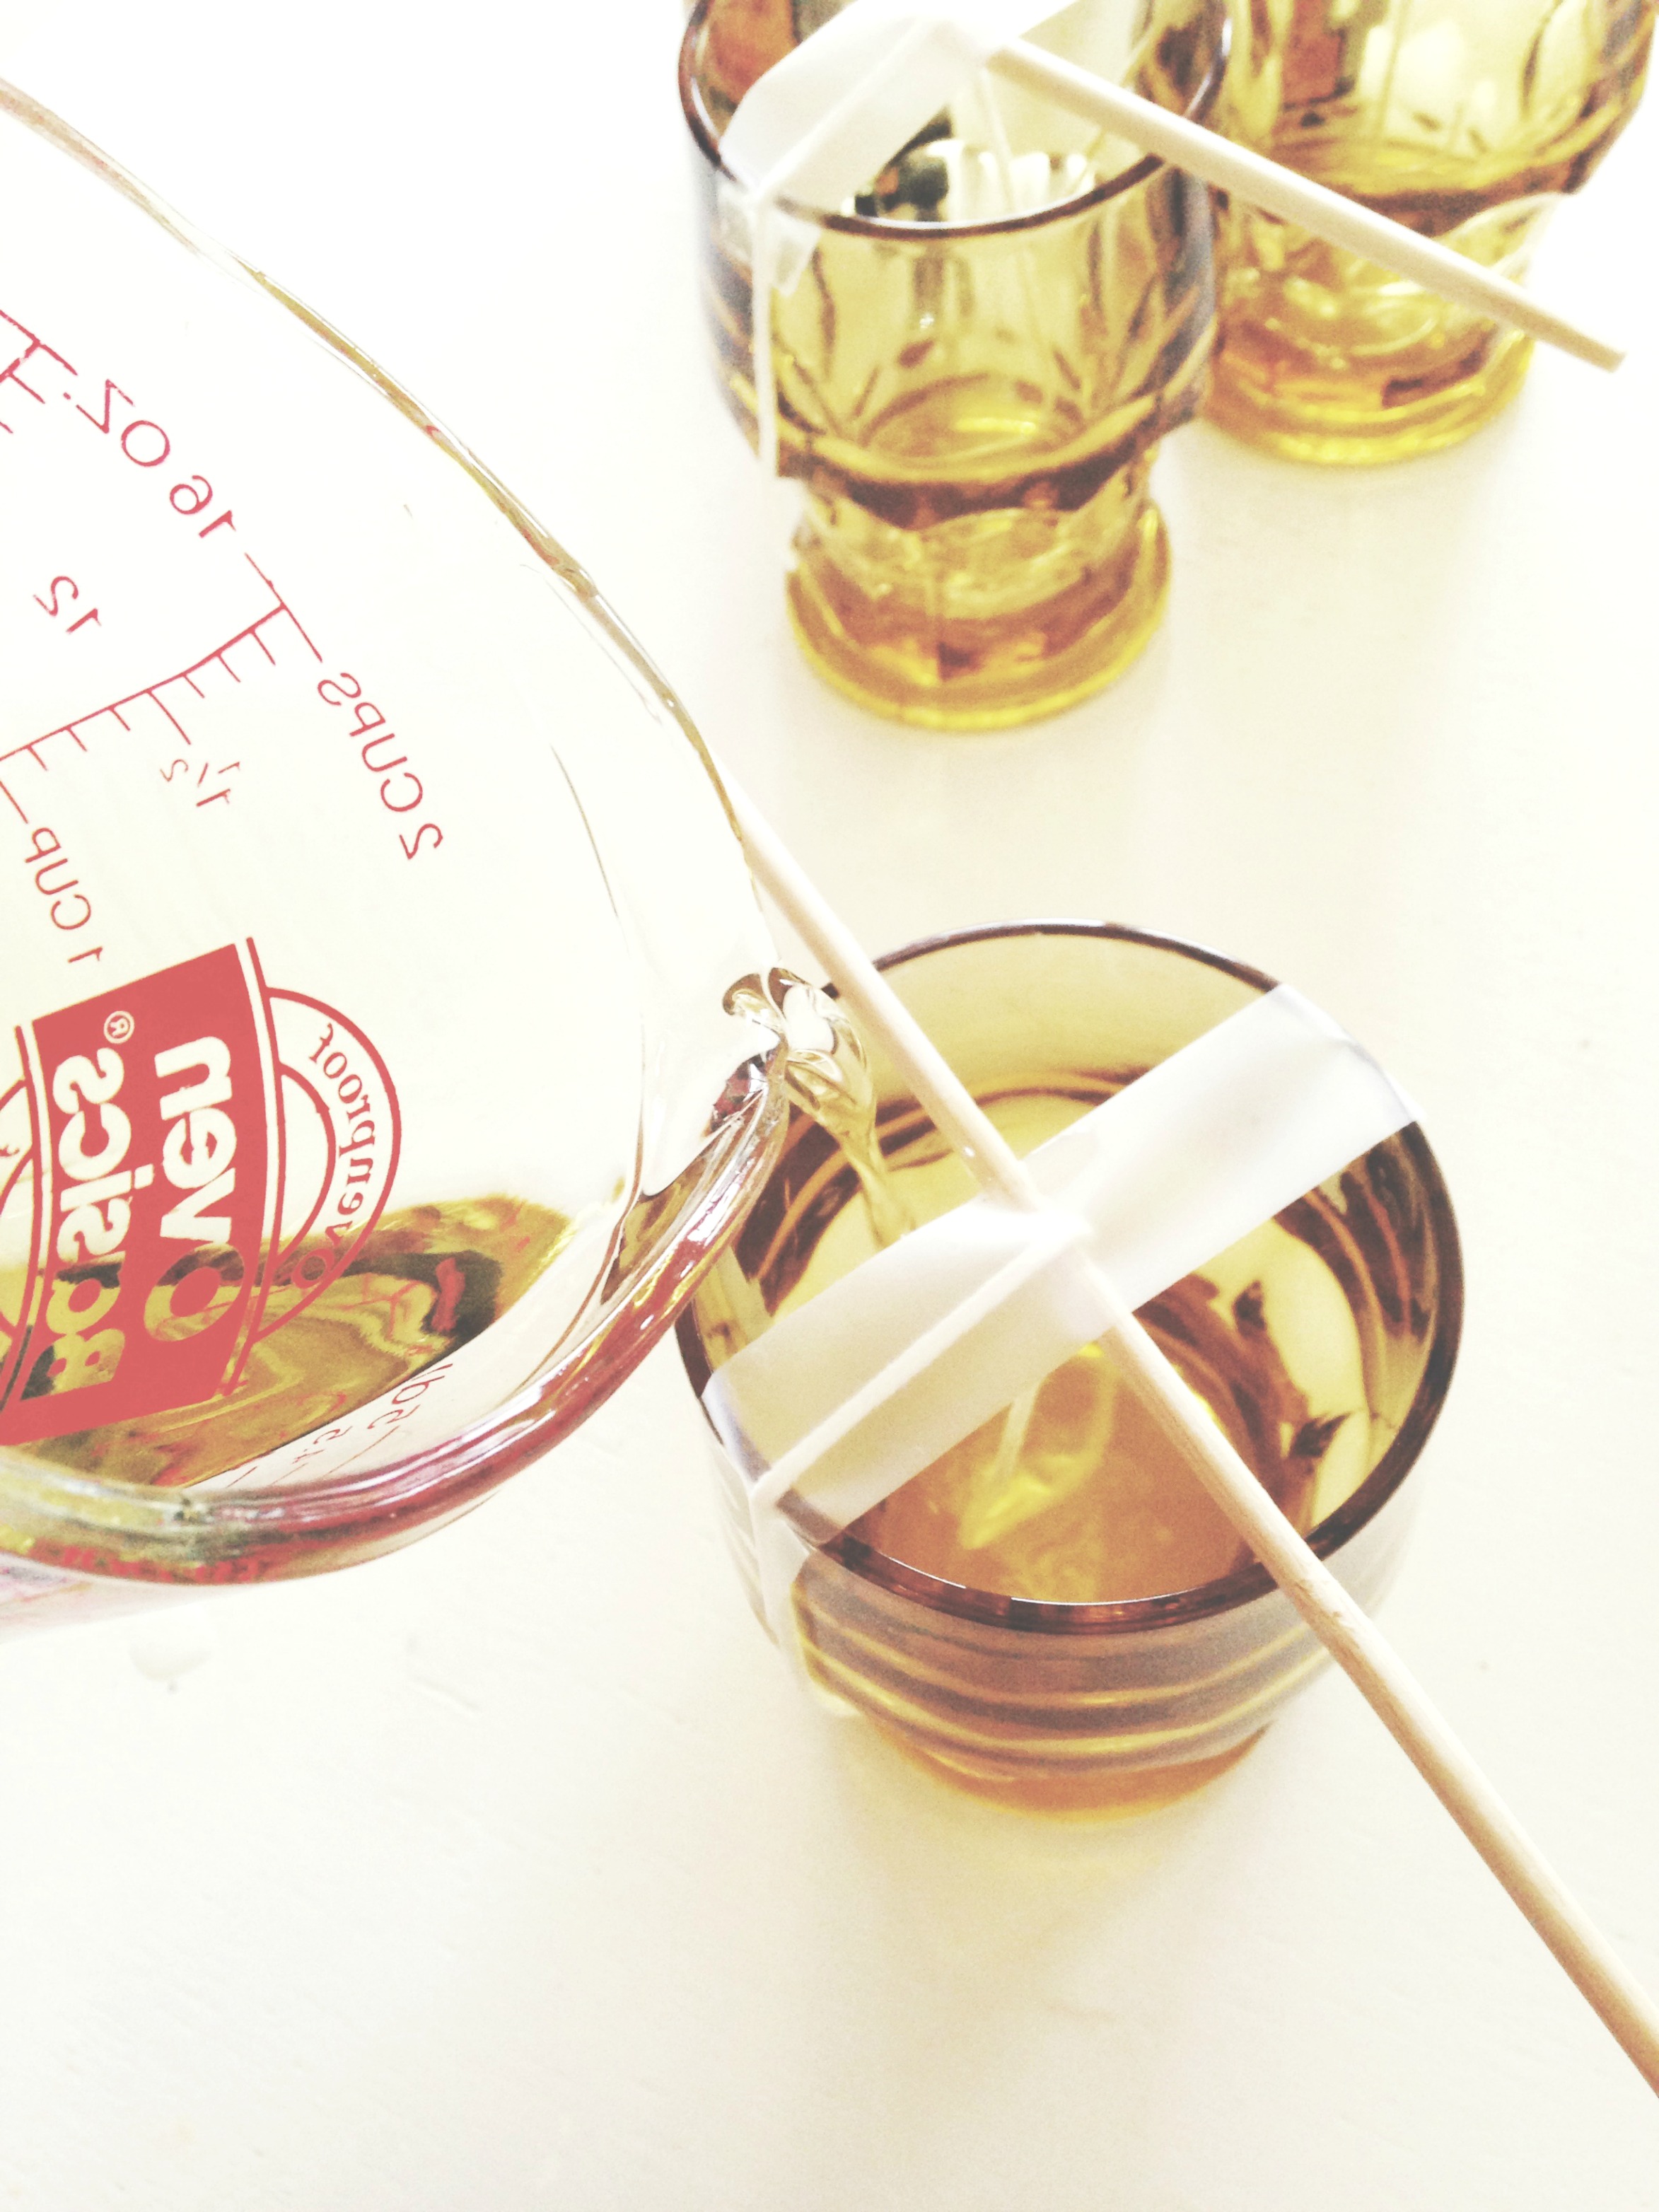
Then just measure out double the amount of wax that would fit in your glass and stick it in the microwave for two minutes, until it’s all clear and liquidy.

Oh, use a mitten to grab the measuring cup because that ish is HOT. Mix in a few drops of lavender (or whatever oil) and give it a quick stir.

Then just caaaarefully pour the hot wax into the glass to avoid a sticky situation.

Get it? Sticky?

Like, the wax can easily stick to thin – okay.

Processed with VSCOcam with t1 preset

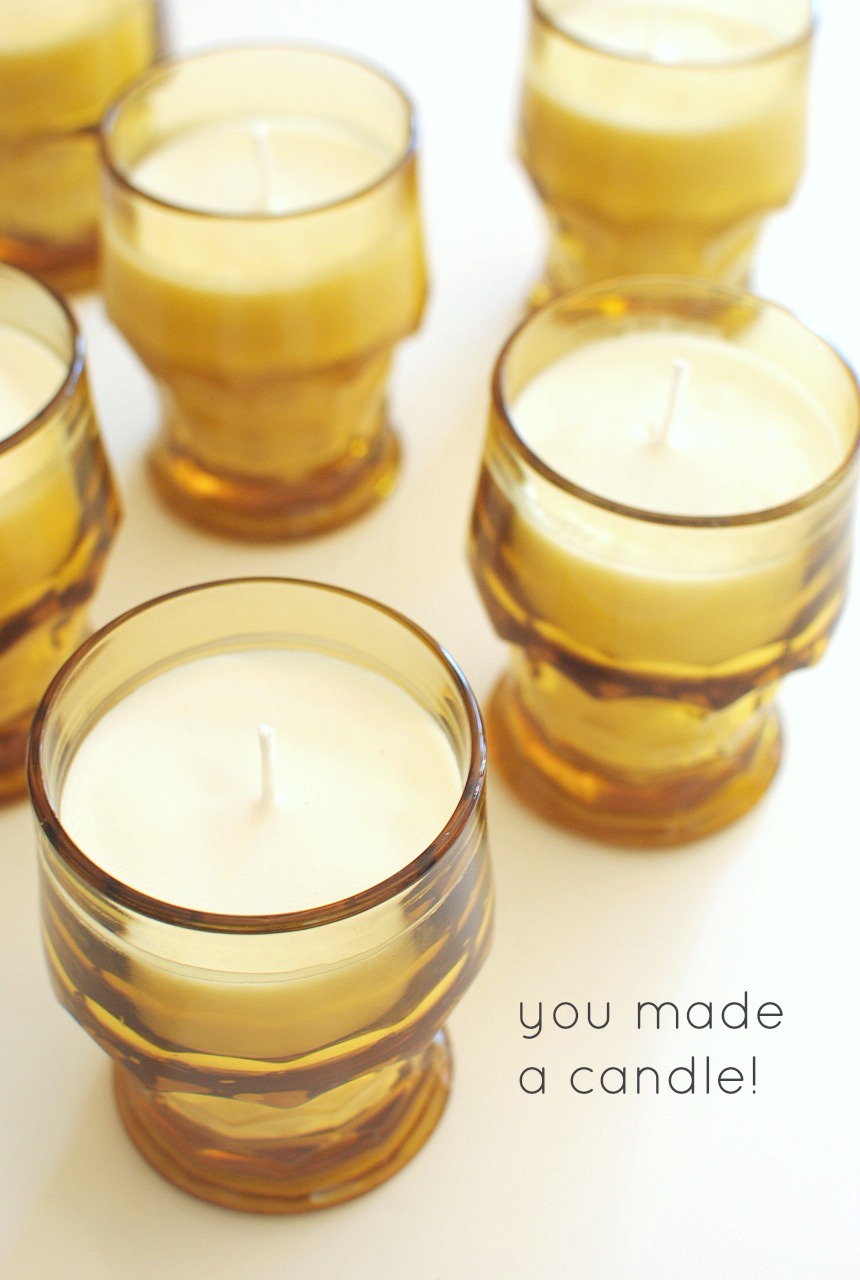
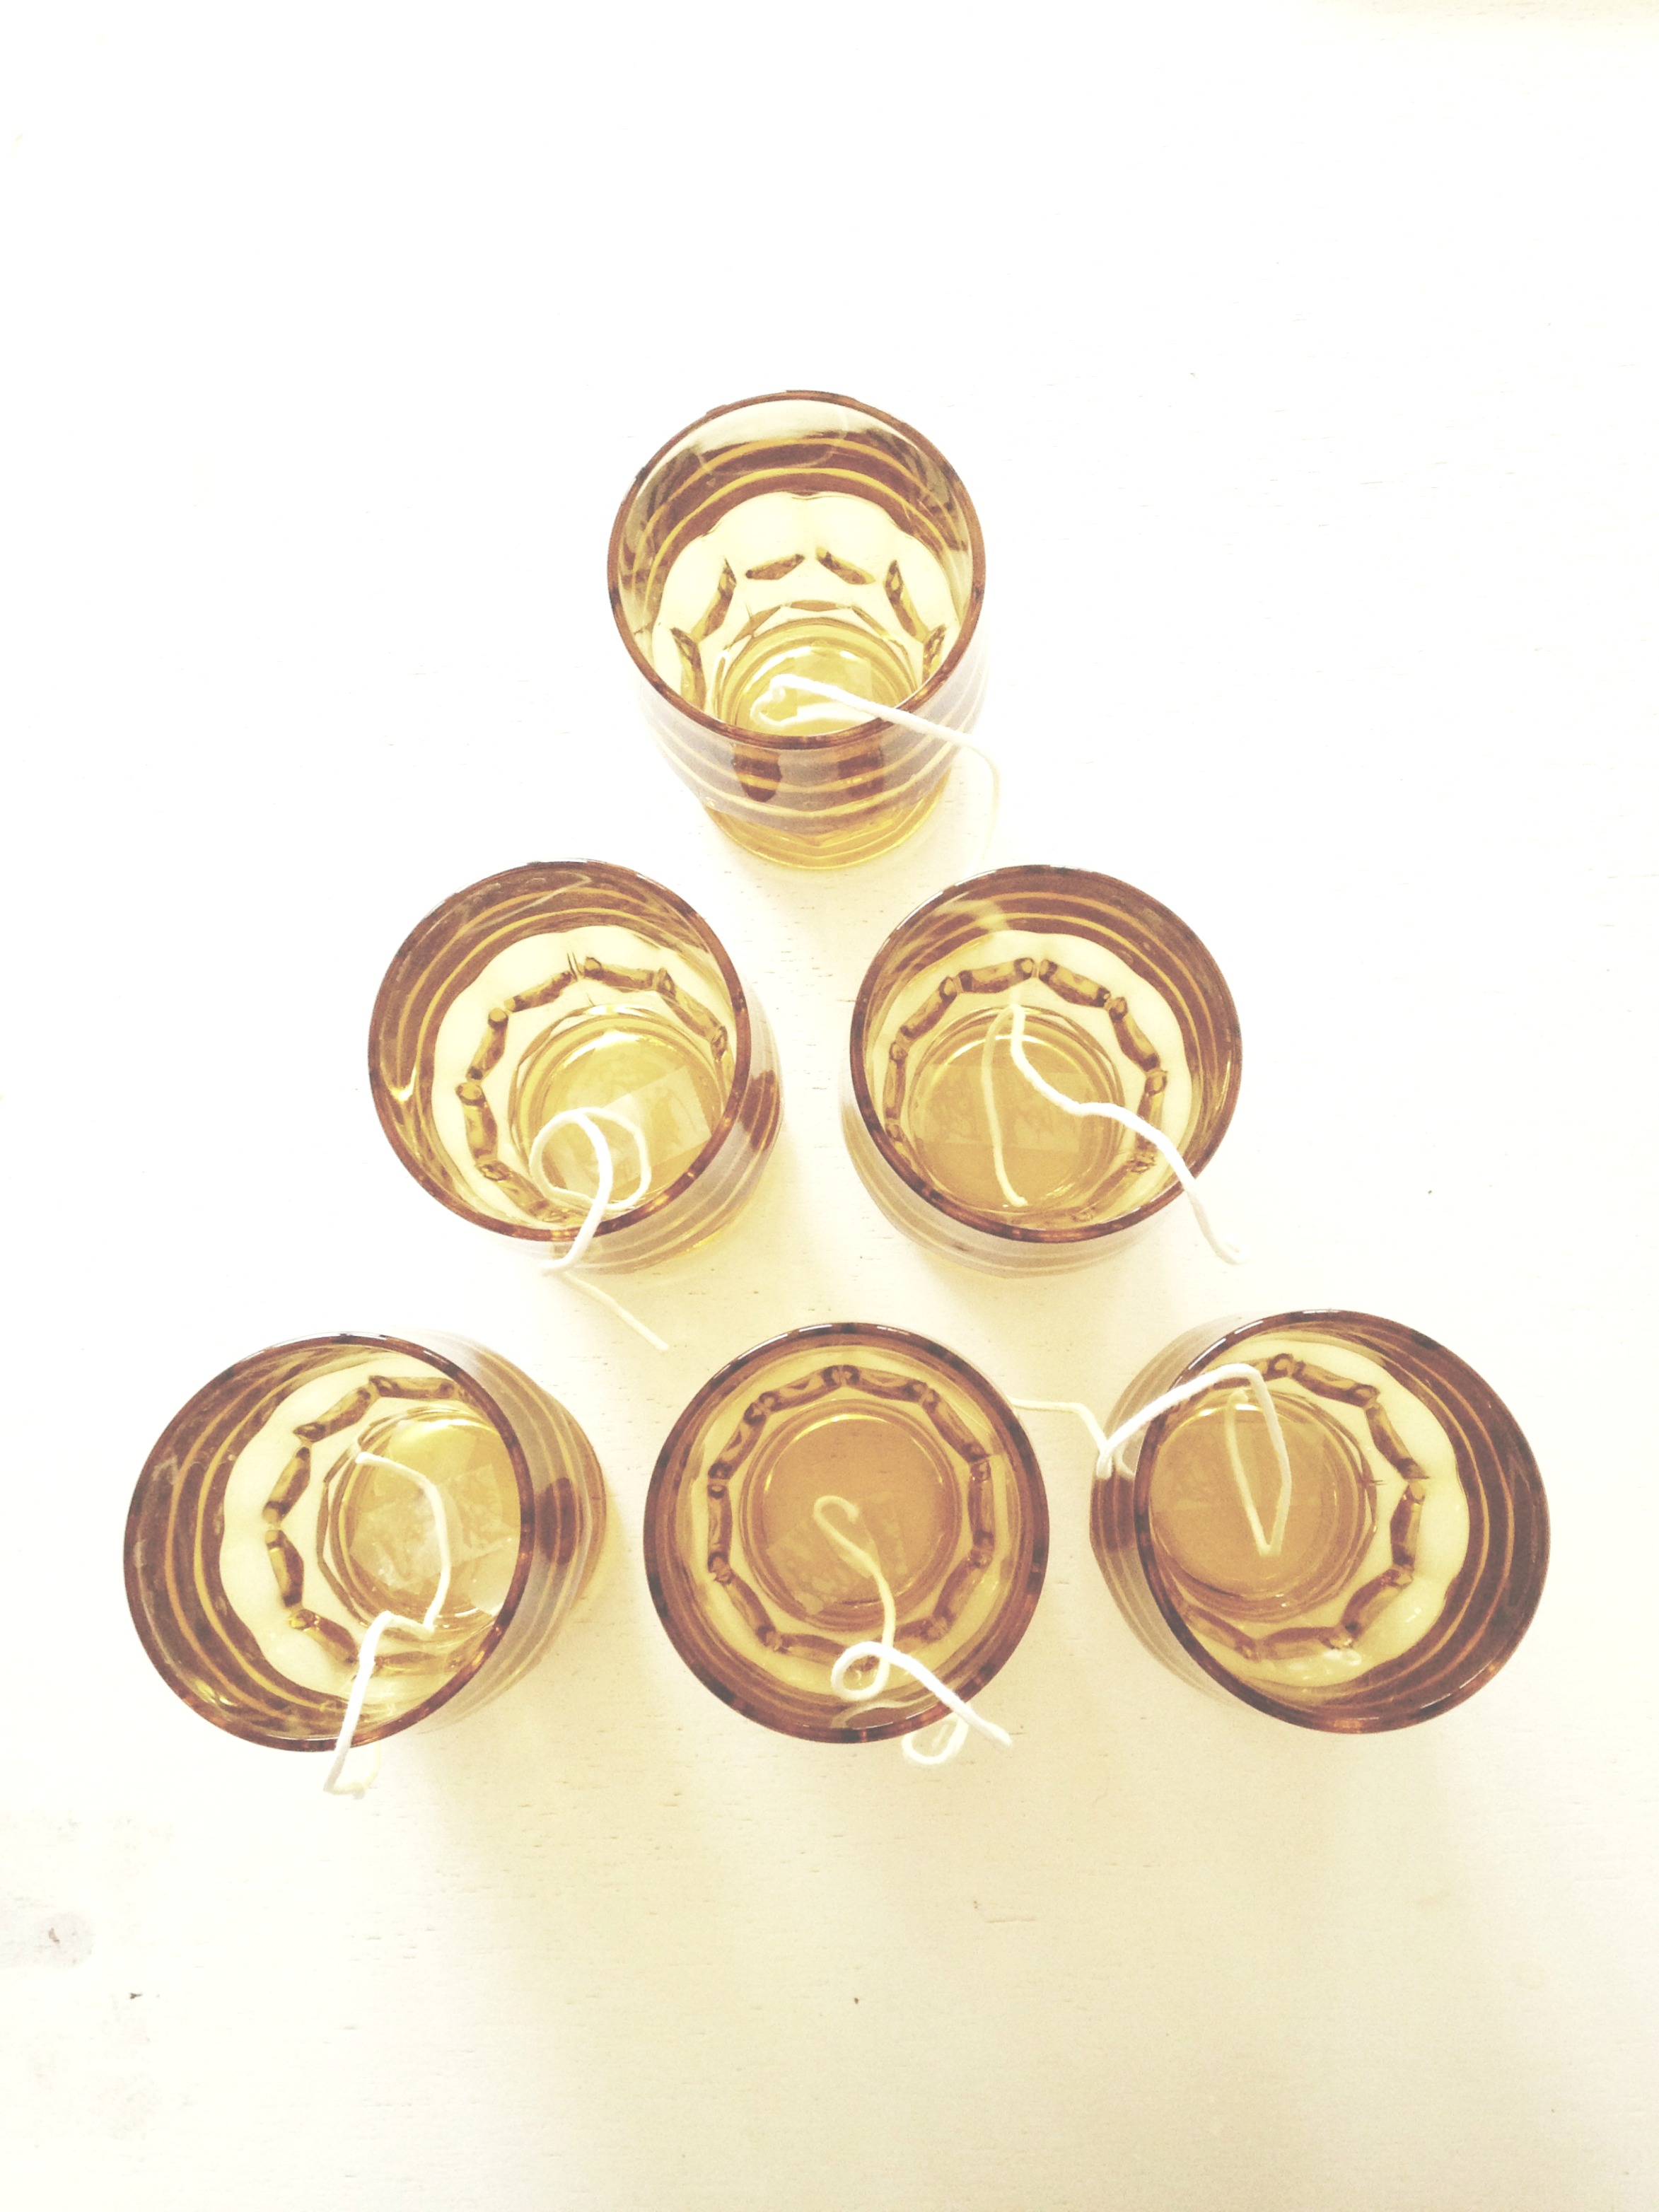
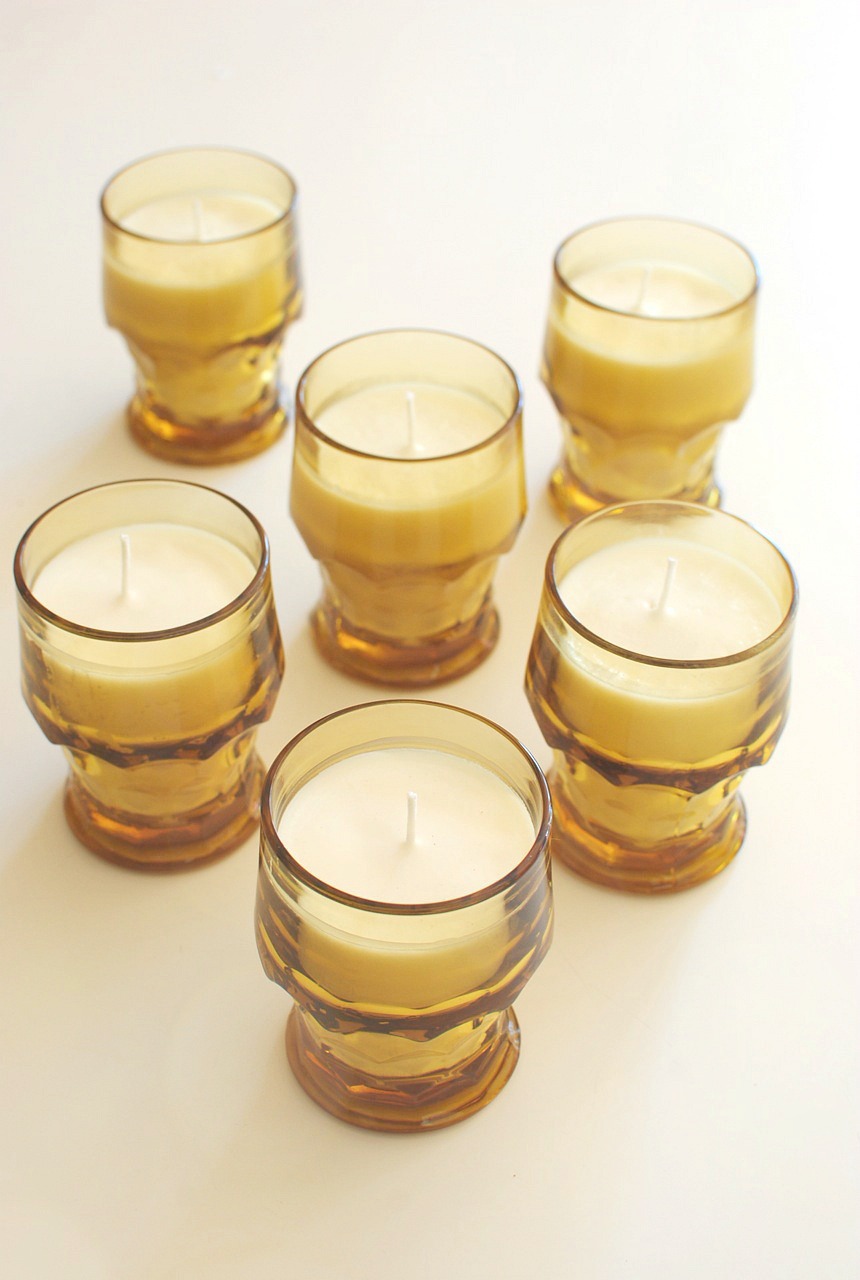
Then you’ll just let them sit for about 12 hours to fully harden up. Remove the sticks and trim the wicks and come on baby, light my fire.

You’re hating me so hard right now.

candle4

Get waxed!

DIY: Lavender Soy Candles:

What it took for 6 candles:

* 12 cups microwavable soy wax (they come in flakes)
* lavender essential oil (or any other scent you dig)
* 1 package wicks, cut into 6-inch strips
* 6 chopsticks (or any little wooden stick type thing you have lying around)
* 6 vintage glasses or small tins
* scotch tape

Tape the bottom of the wick to the bottom of each glass. I used a chopstick to help me guide and press the wick into place. Then hold the wick in the center of the glass and tape the chopstick to it, keeping it in place. Photos will make more sense.

Measure out two cups of wax at a time. Microwave for two minutes (or a little less) until the wax has completely melted. Add 8ish drops of lavender oil to the melted wax. Stir it around a little.

Gently pour the melted wax into each glass, careful not to touch the sides.

Let harden for 12 hours. Gently remove the chopstick and trim the wick. Done.

*one thing to note! Pour some water into whatever you plan on using as your candle holder. Then double the amount of wax. That’s what will fit in your vessel. Sorry I said vessel.

candle5

Such a smokin’ gift!

Get it? Smoke?

Like, the cand – aaaand you’re gone.

, ,

25 Responses to DIY: Lavender Soy Candles

  1. JulieD December 19, 2013 at 6:52 am #
    Love this so much, Bev!! I'm going to try it!!
  2. Dixya @ Food, Pleasure, and Health December 19, 2013 at 8:32 am #
    i am on a hunt for soy wax now, of course the microwavable type.
  3. Megan {Country Cleaver} December 19, 2013 at 8:44 am #
    Ohhh you know how I love a good pun. Or punssss so early in the morning. No really, I do. I've been wanting to make candles for so long now - these are gettin' did.
  4. DessertForTwo December 19, 2013 at 8:51 am #
    I want them all! I would keep them all!
  5. Georgia @ The Comfort of Cooking December 19, 2013 at 10:13 am #
    No friggin' way! These are amazing, Bev. Look at you go!
  6. Erin L December 19, 2013 at 10:43 am #
    How pretty!!!! Gotta try this! Thank you!!
  7. aida mollenkamp December 19, 2013 at 12:02 pm #
    Where did you get those votives? I *LOVE* them!
    • Bev Weidner December 20, 2013 at 7:13 am #
      I just thrifted the little glasses!
  8. Ordinary J December 19, 2013 at 1:50 pm #
    What a great idea! These candles seem to be easy to do. I love the short ingredient list. Thank you so much for sharing.
  9. Tracey @ Cooking with Love December 19, 2013 at 7:55 pm #
    I have been wanting to make these forever!!!! Thanks for showing how easy it is to make. Now I am going to make them for sure! :)
  10. Coty and Mariah@quirksandtwists December 19, 2013 at 8:16 pm #
    Digging this simple yet awesome DIY!
  11. Jackie @ The Beeroness December 20, 2013 at 12:26 pm #
    Those are so adorable! Now I must scour the thrift store to pop some tags on some vintage cups.
  12. Stephanie @ Eat. Drink. Love. December 20, 2013 at 11:51 pm #
    I sooo want to do this!!
  13. Tabitha December 21, 2013 at 3:12 pm #
    Puns aside, I can't wait to try this.
  14. Paula – bell’alimento December 22, 2013 at 2:59 pm #
    Bev, I love these DIY candles! I will have to give them a try!
  15. Nutmeg Nanny December 27, 2013 at 6:34 pm #
    These are gorgeous :) Something I'd just adore if I received it!
  16. CAH // TheCarboholic January 24, 2014 at 4:30 pm #
    I've been wanting to make homemade candles for a long time and finally did after reading this post. I appreciate your simple instructions and am super happy with how they turned out. I had them done and ready to dry in probably 10 minutes. These will make lovely hostess gifts and I can't wait to try out more scents. Thanks Bev, and hope all is well with the little monkeys! http://thecarboholic.com/2014/01/24/diy-microwave-soy-candles/
  17. carey March 5, 2014 at 11:57 am #
    you are absolutely hilarious! I smiled and laughed the whole time i read it. I will definiteky try this
  18. Sophie Nylor June 24, 2015 at 7:09 am #
    Wondering if you can use smaller glasses like shot glasses? I have a lot of those lying around and i'm not sure if they will make good candles.
    • Bev Weidner June 24, 2015 at 8:15 am #
      Absolutely! They'll be tiny candles, but they'll work!

Trackbacks/Pingbacks

  1. DIY Microwave Soy Candles | The Carboholic - January 24, 2014 […] wanting to do this for ages, but didn’t have all the supplies. When I saw this post over at Bev Cooks, I squealed with joy and did a little Amazon Prime ordering […]
  2. 10 Lavender Recipes for Your Home - March 19, 2014 […] Bev Cook’s Homemade Lavender Soy Candles […]
  3. 10 tutoriales para hacer velas en casa | El tarro de ideasEl tarro de ideas - September 25, 2014 […]  Visto aquí […]
  4. Snoopits: The Surface Edition | Bev Cooks - March 3, 2015 […] Also, those are my homemade patchouli candles on top of the cookbook. #danghippie […]
  5. DIY: Spray Cleaners and Room Spray (Using Essential Oils) | Bev Cooks - March 18, 2015 […] tins, spray paint glass cups copper, and voila, a ridic ton of candles. I already have an entire post on how to make these, so I won’t bore you again. You’re like, […]

Leave a Reply