Bread. Art. You guys!!!
If there is something more cut out for my life, I’m willing to hear it. But I’m not sure there is.
I am dying over this. DYING.
And it’s like, not even that great.
Of course I’ve seen these garden art designs on Pinterest for a while, and have been obsessed with trying it. I have no idea what took me so long because ARE YOU KIDDING WITH THIS.
Have you seen it before? I’m not into b.s. trends, but this – this I can do. And will for the rest of my life.
So the two main things in this post are 1) the bread recipe. And 2) inspiration! You can do anything. I kept mine simple with this first attempt, but I’m already starting more dough today so that I can try a new route tomorrow. I’ll show you that one if it’s not super jank.
Let us peepeth.
The bread recipe is spin on my no-knead. But instead of all-purpose, I used bread flour. Which I feel like made it extra stretchy and velvety. That might be in my head. I know it’s a protein thing, but it just works for this focaccia!
The focaccia technique comes from BreadSong, a pretty bread book I received for my birthday.
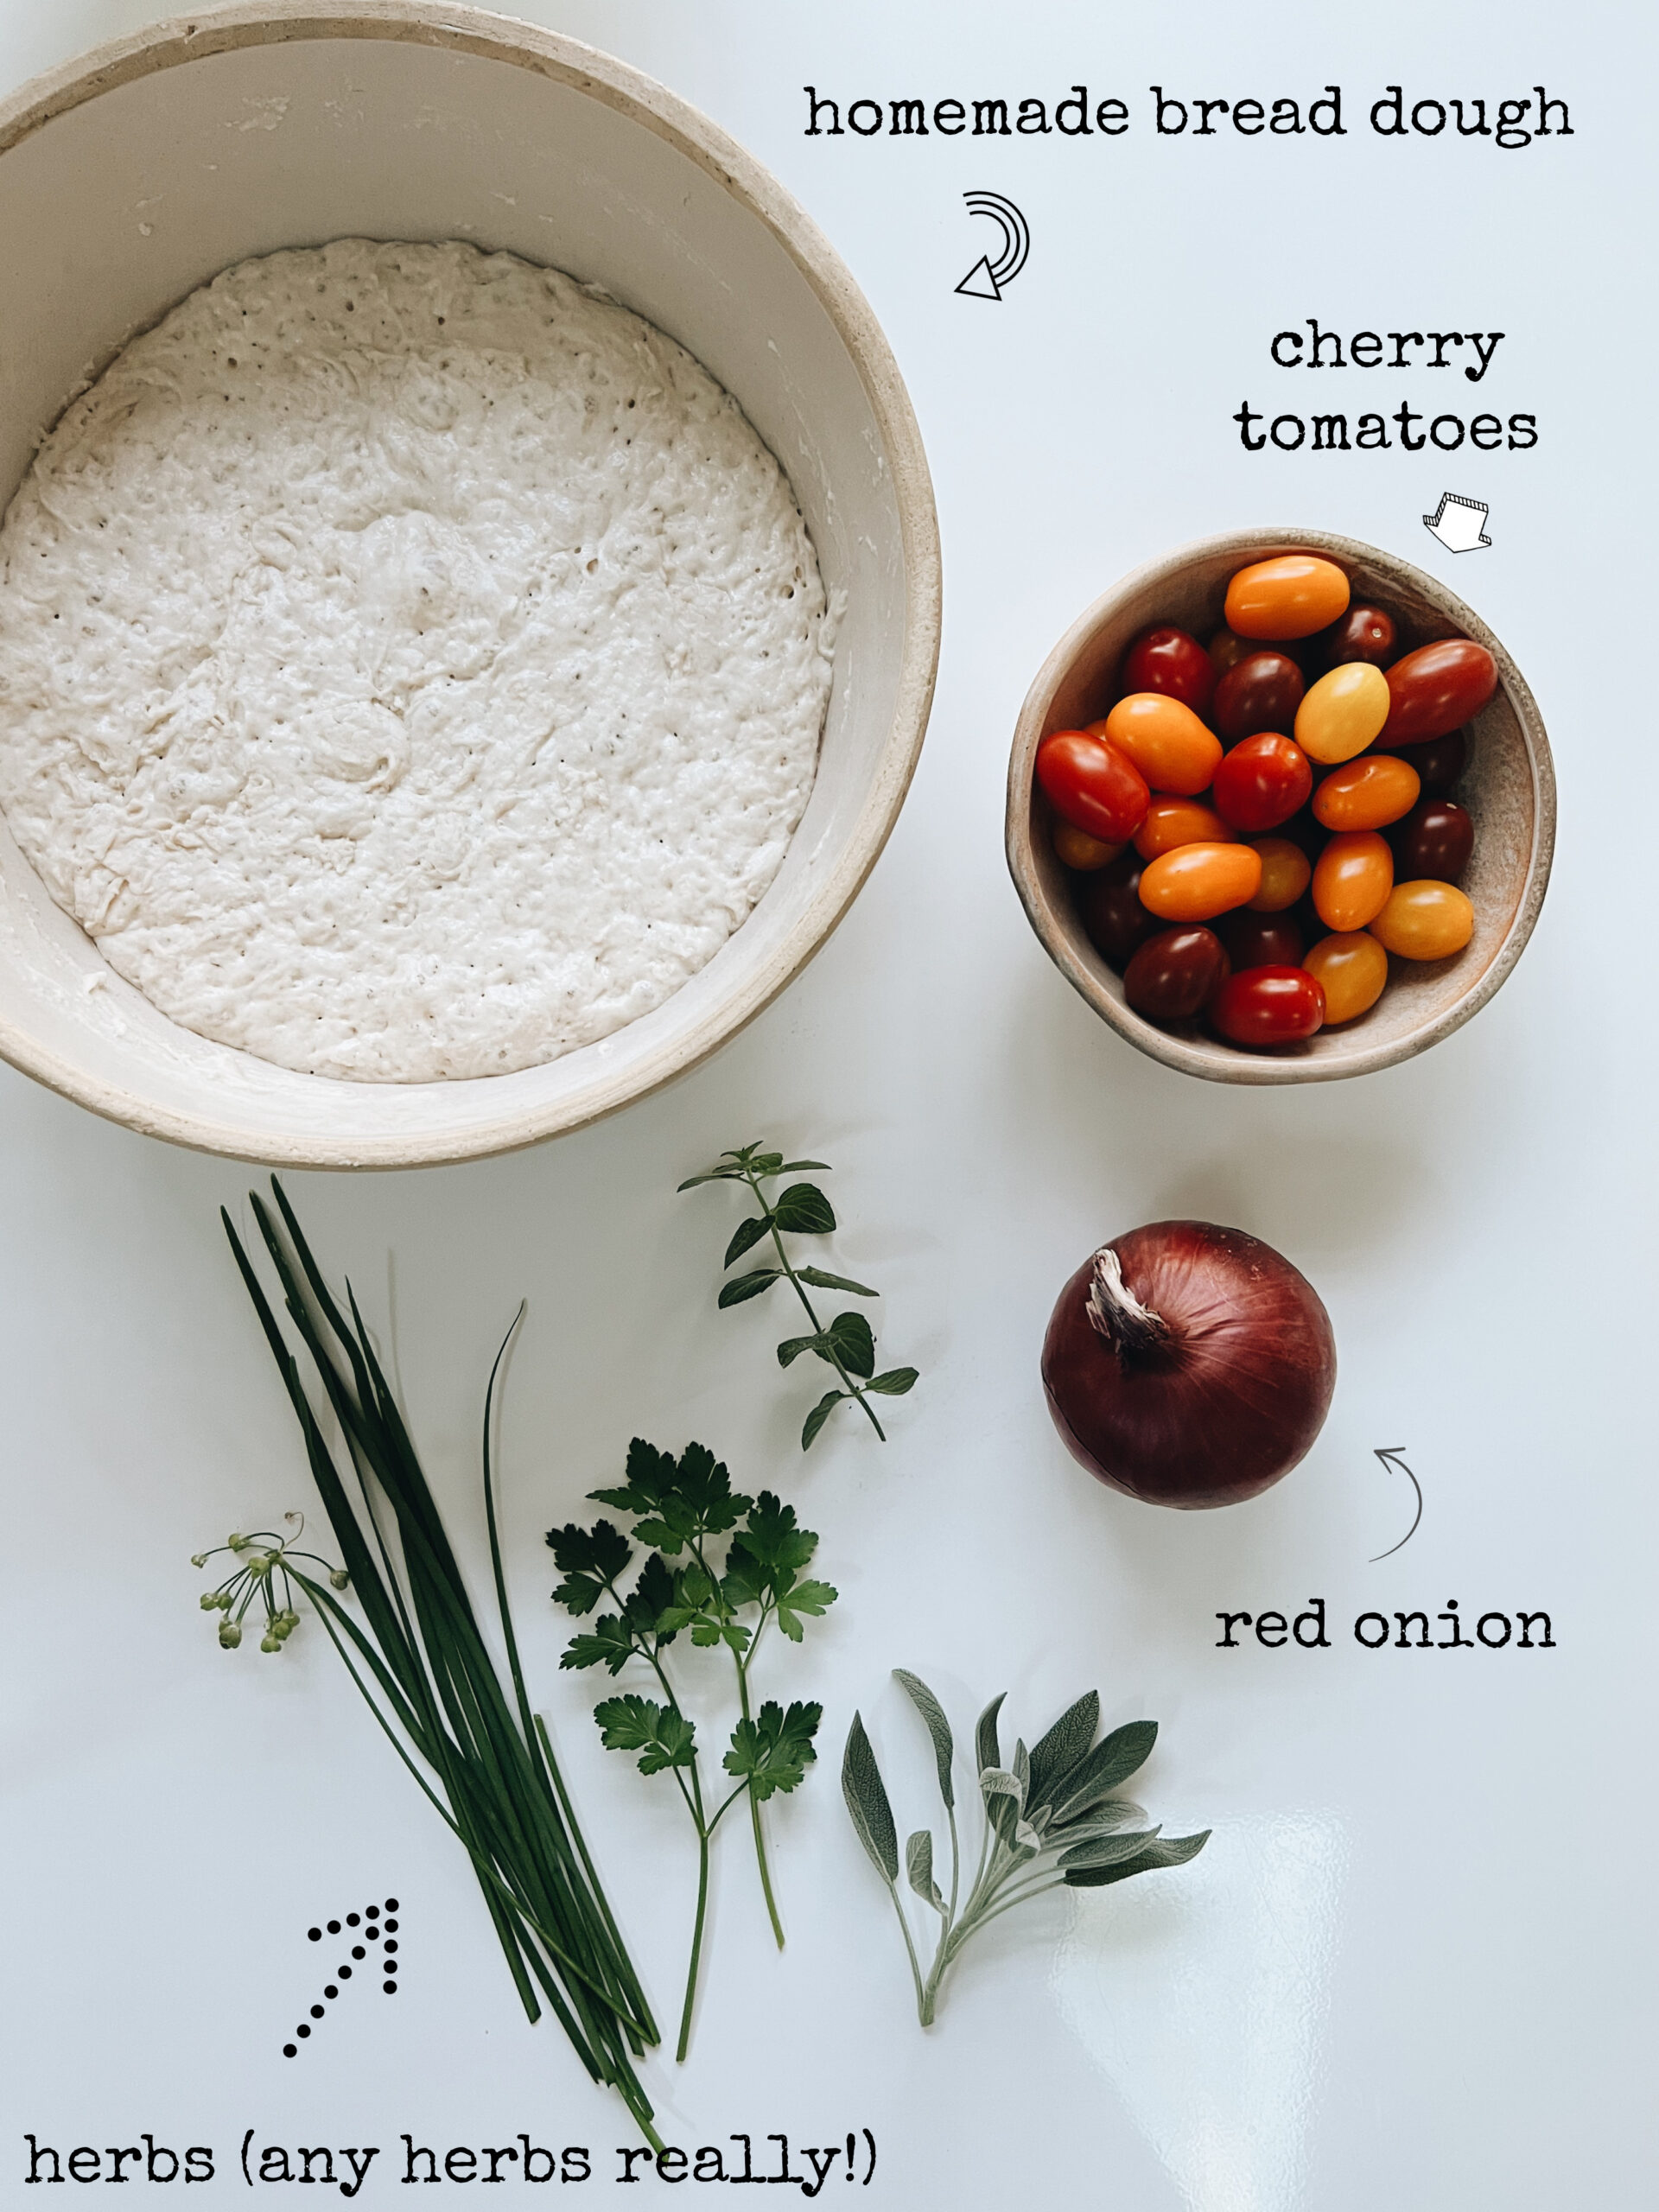
And the rest? I grabbed herbs from the garden, a red onion and a few multi-colored cherry tomatoes.
So you’ll start the dough the day before, like the no-knead, and this is next day.
Look at it!!
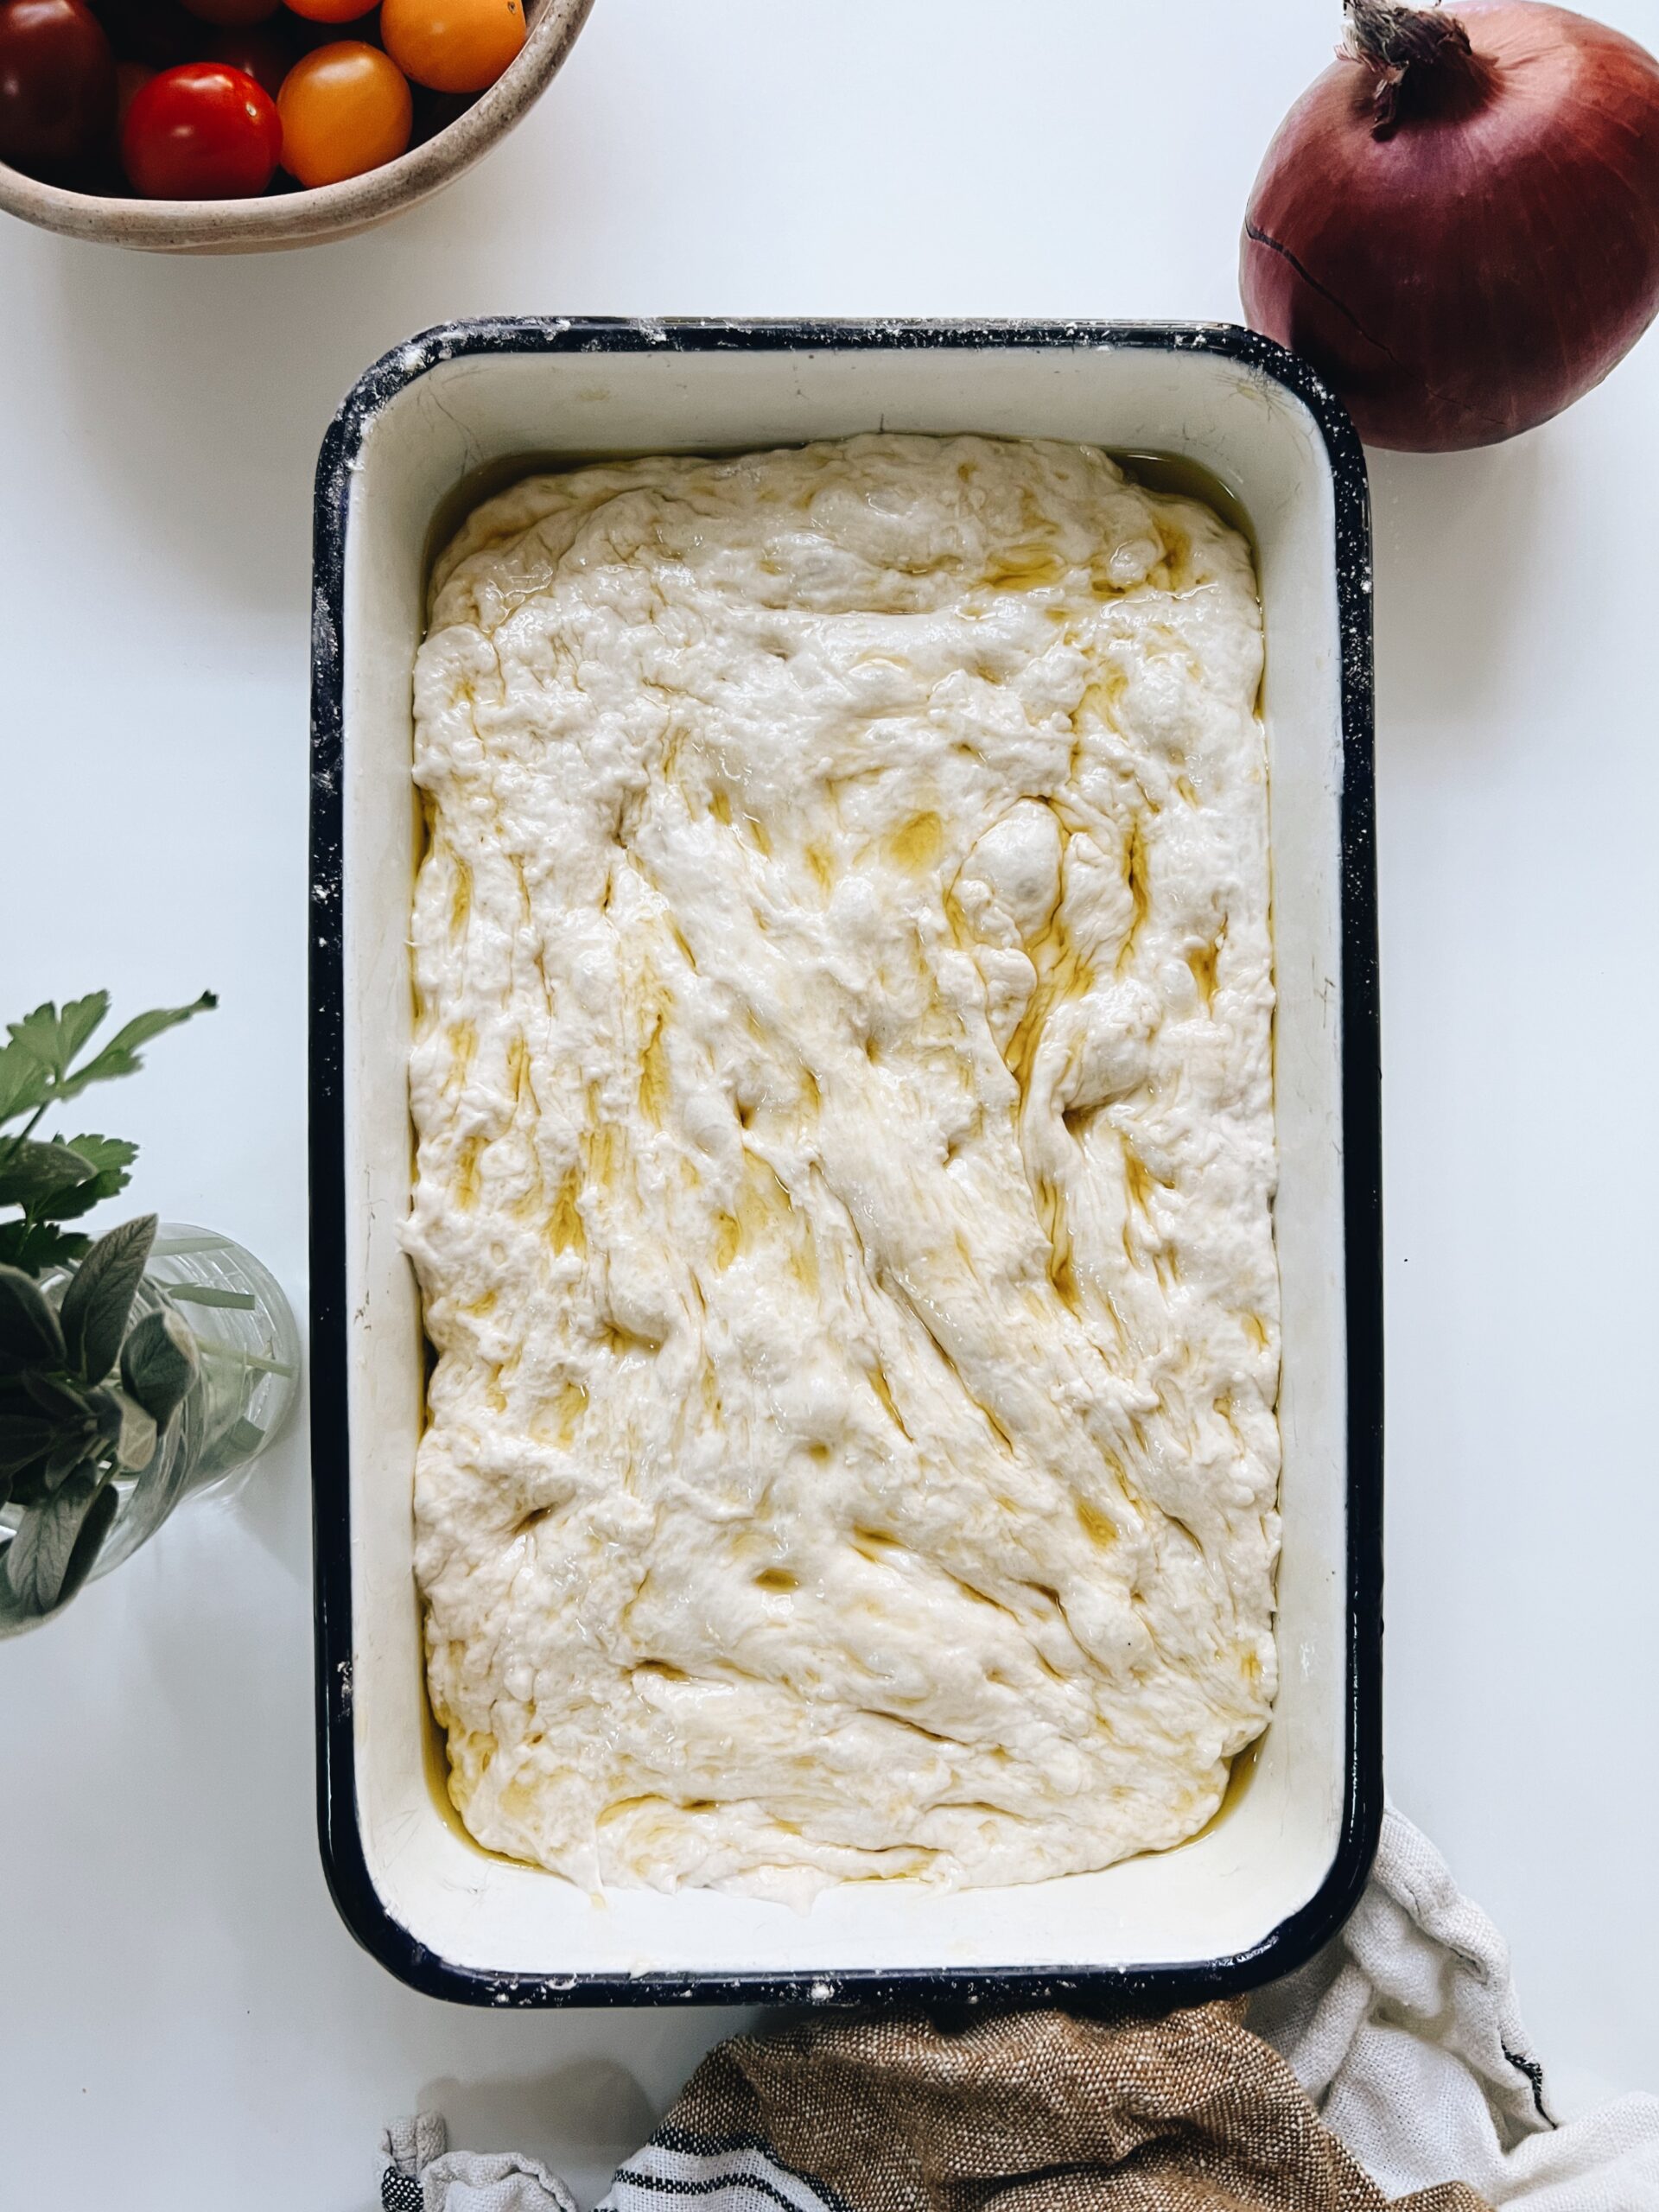
I’m telling you, it plopped out of the pan beautifully and straight into this well-oiled dish like a dang dream. You’ll dimple it in your fingers. Kind of wiggle them in. So, so sorry for saying it like that. Then drizzle more oil over the top.
Then we’ll let this rest for about two hours while we put up laundry and vacuum the rugs and trim our nose hairs.
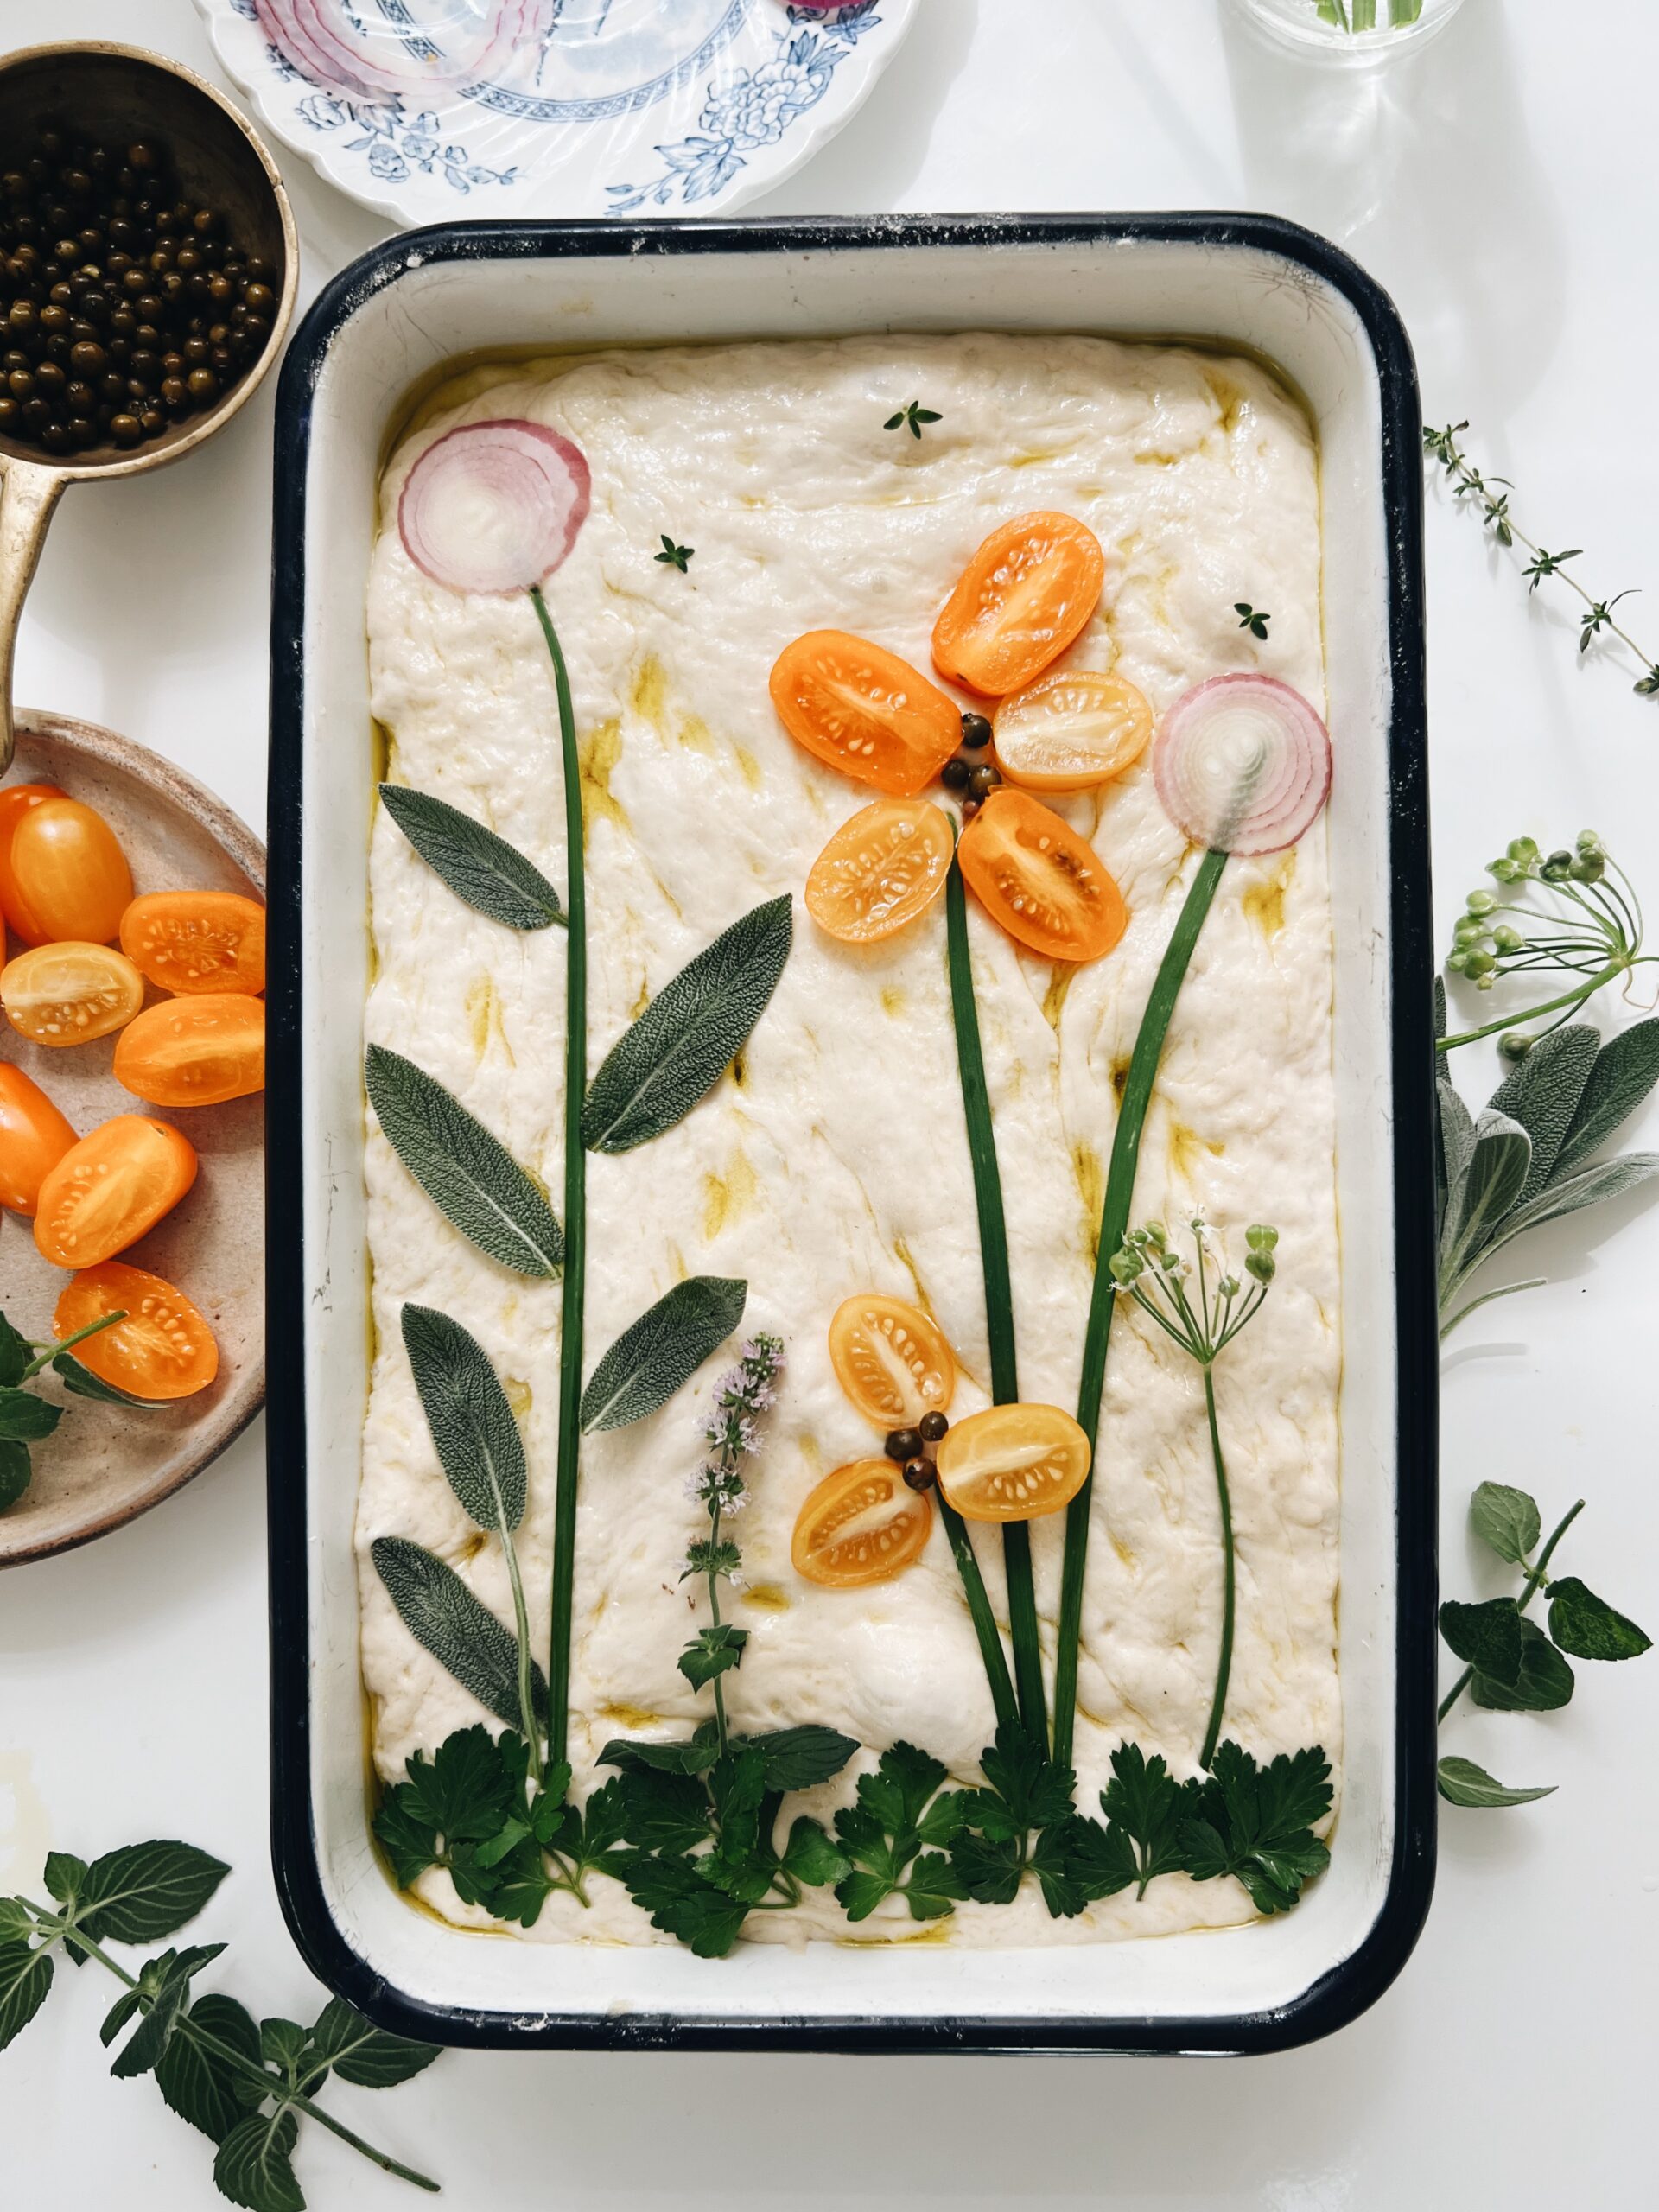
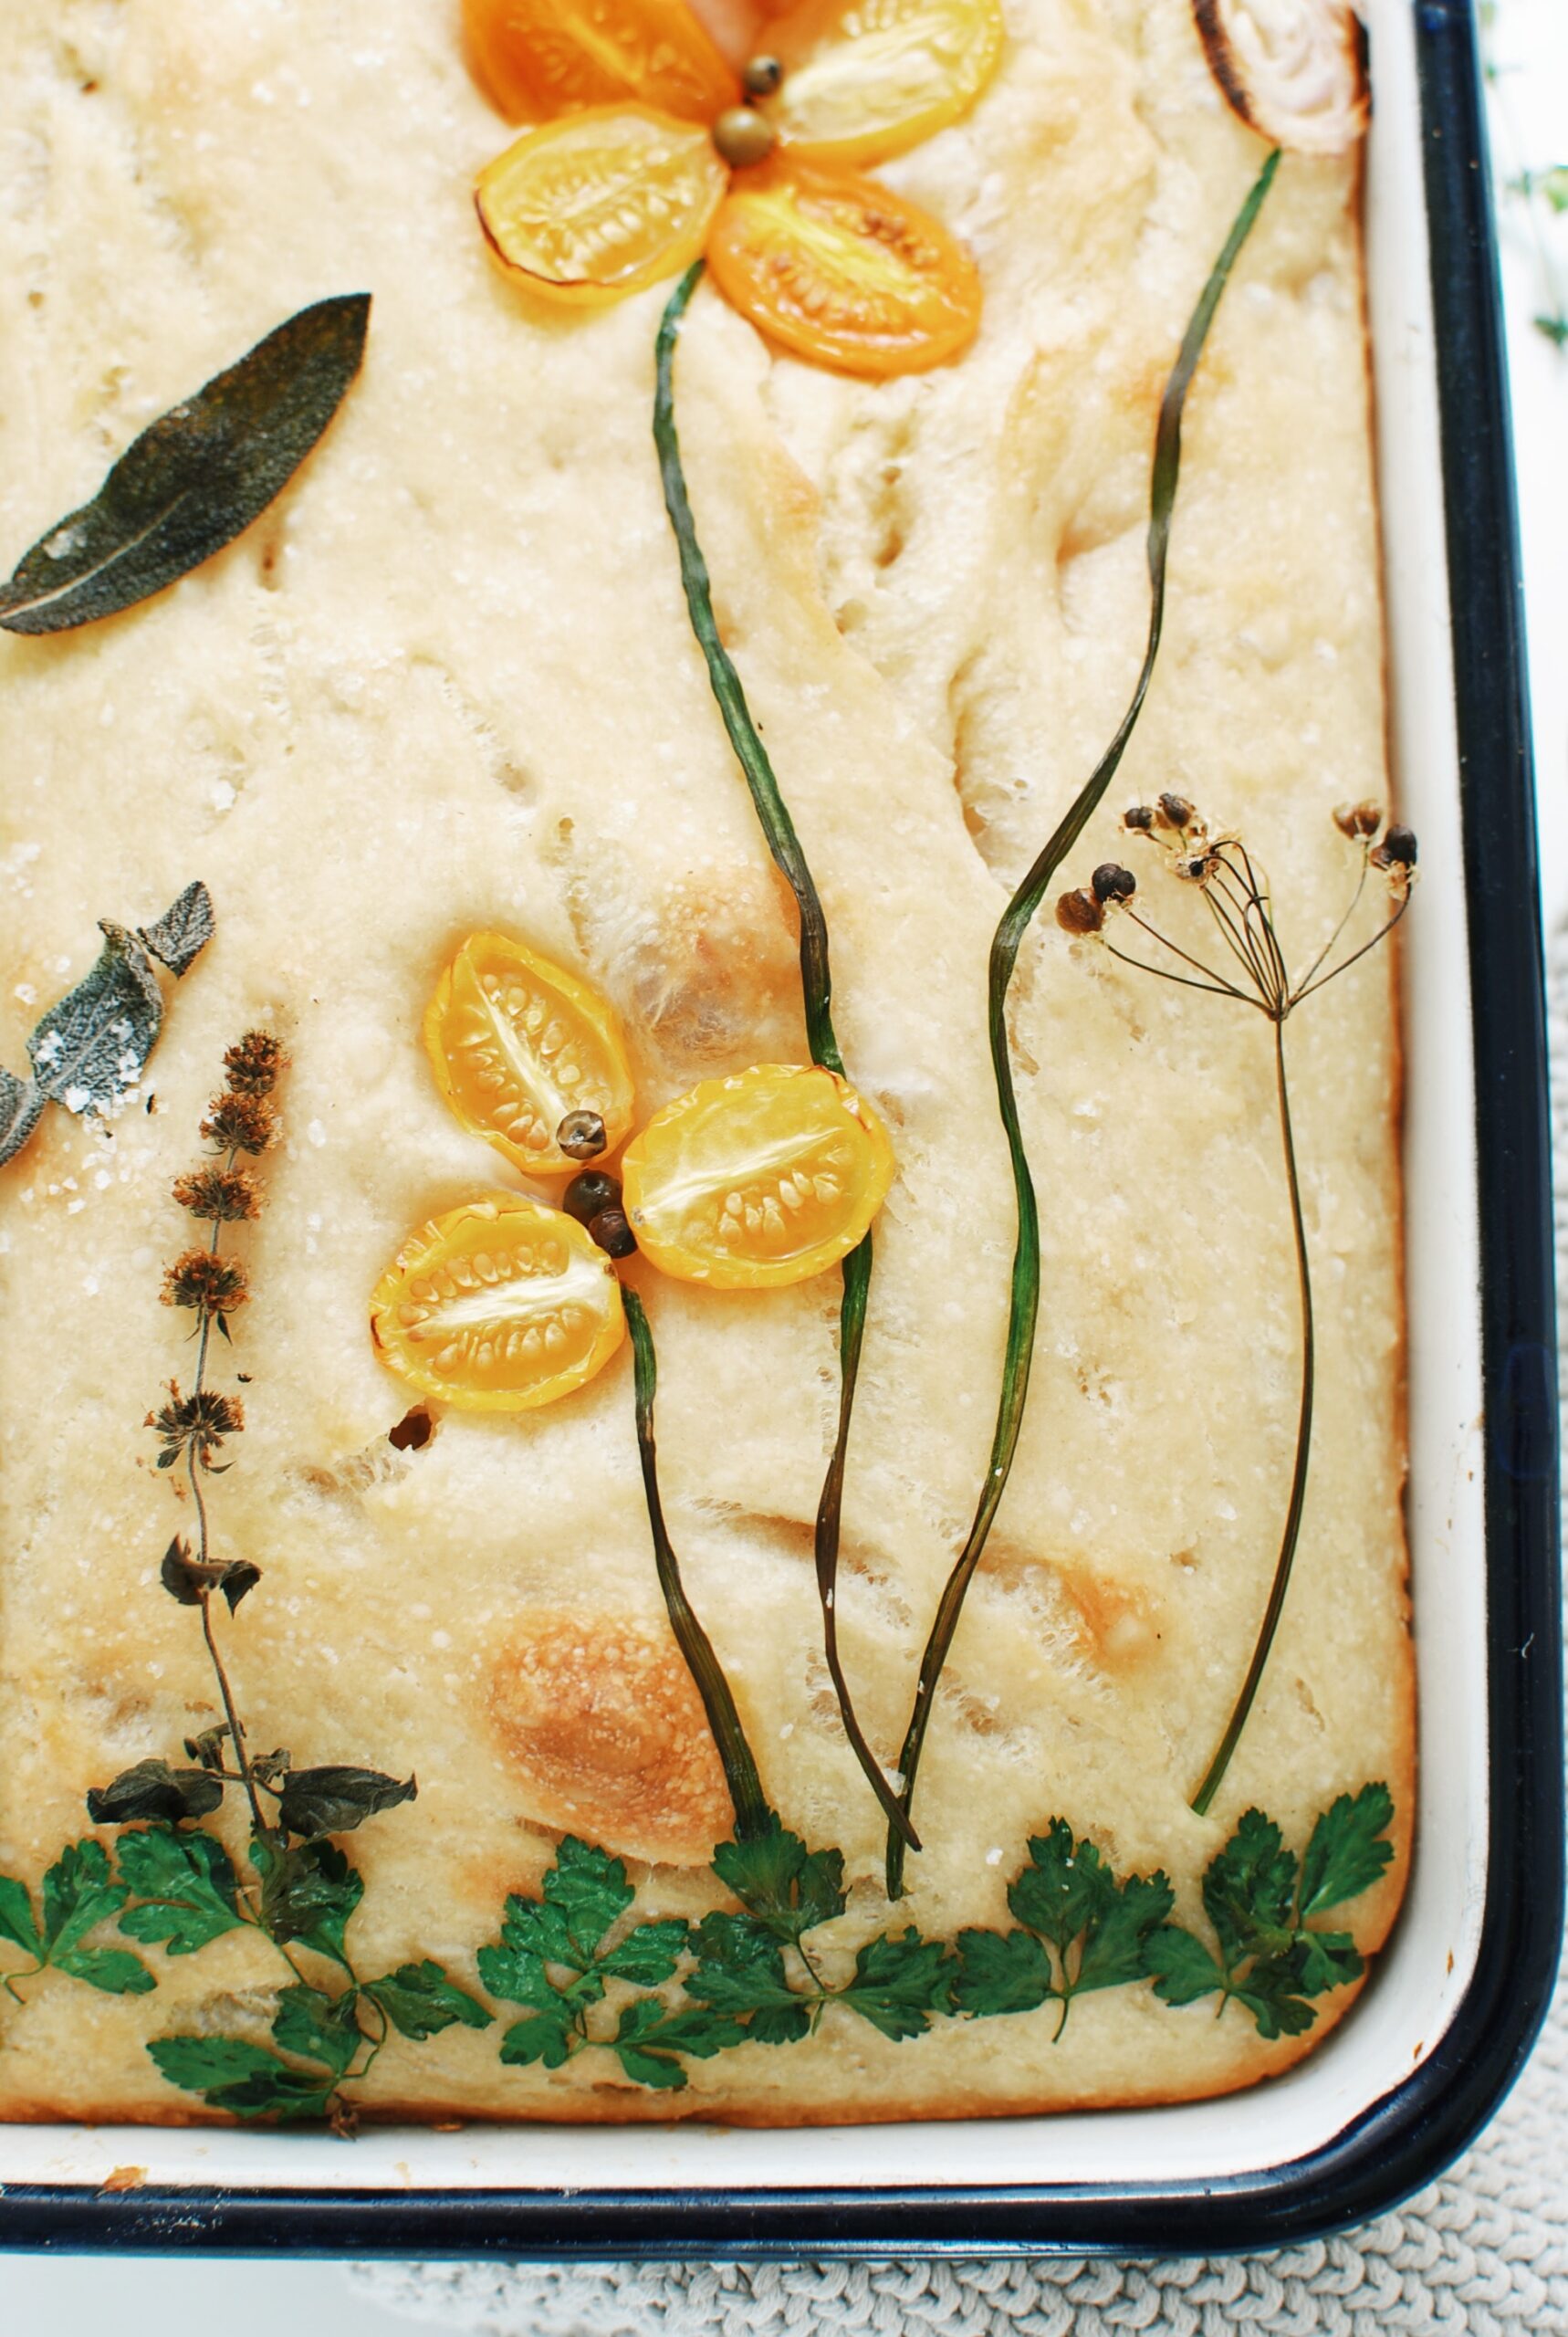
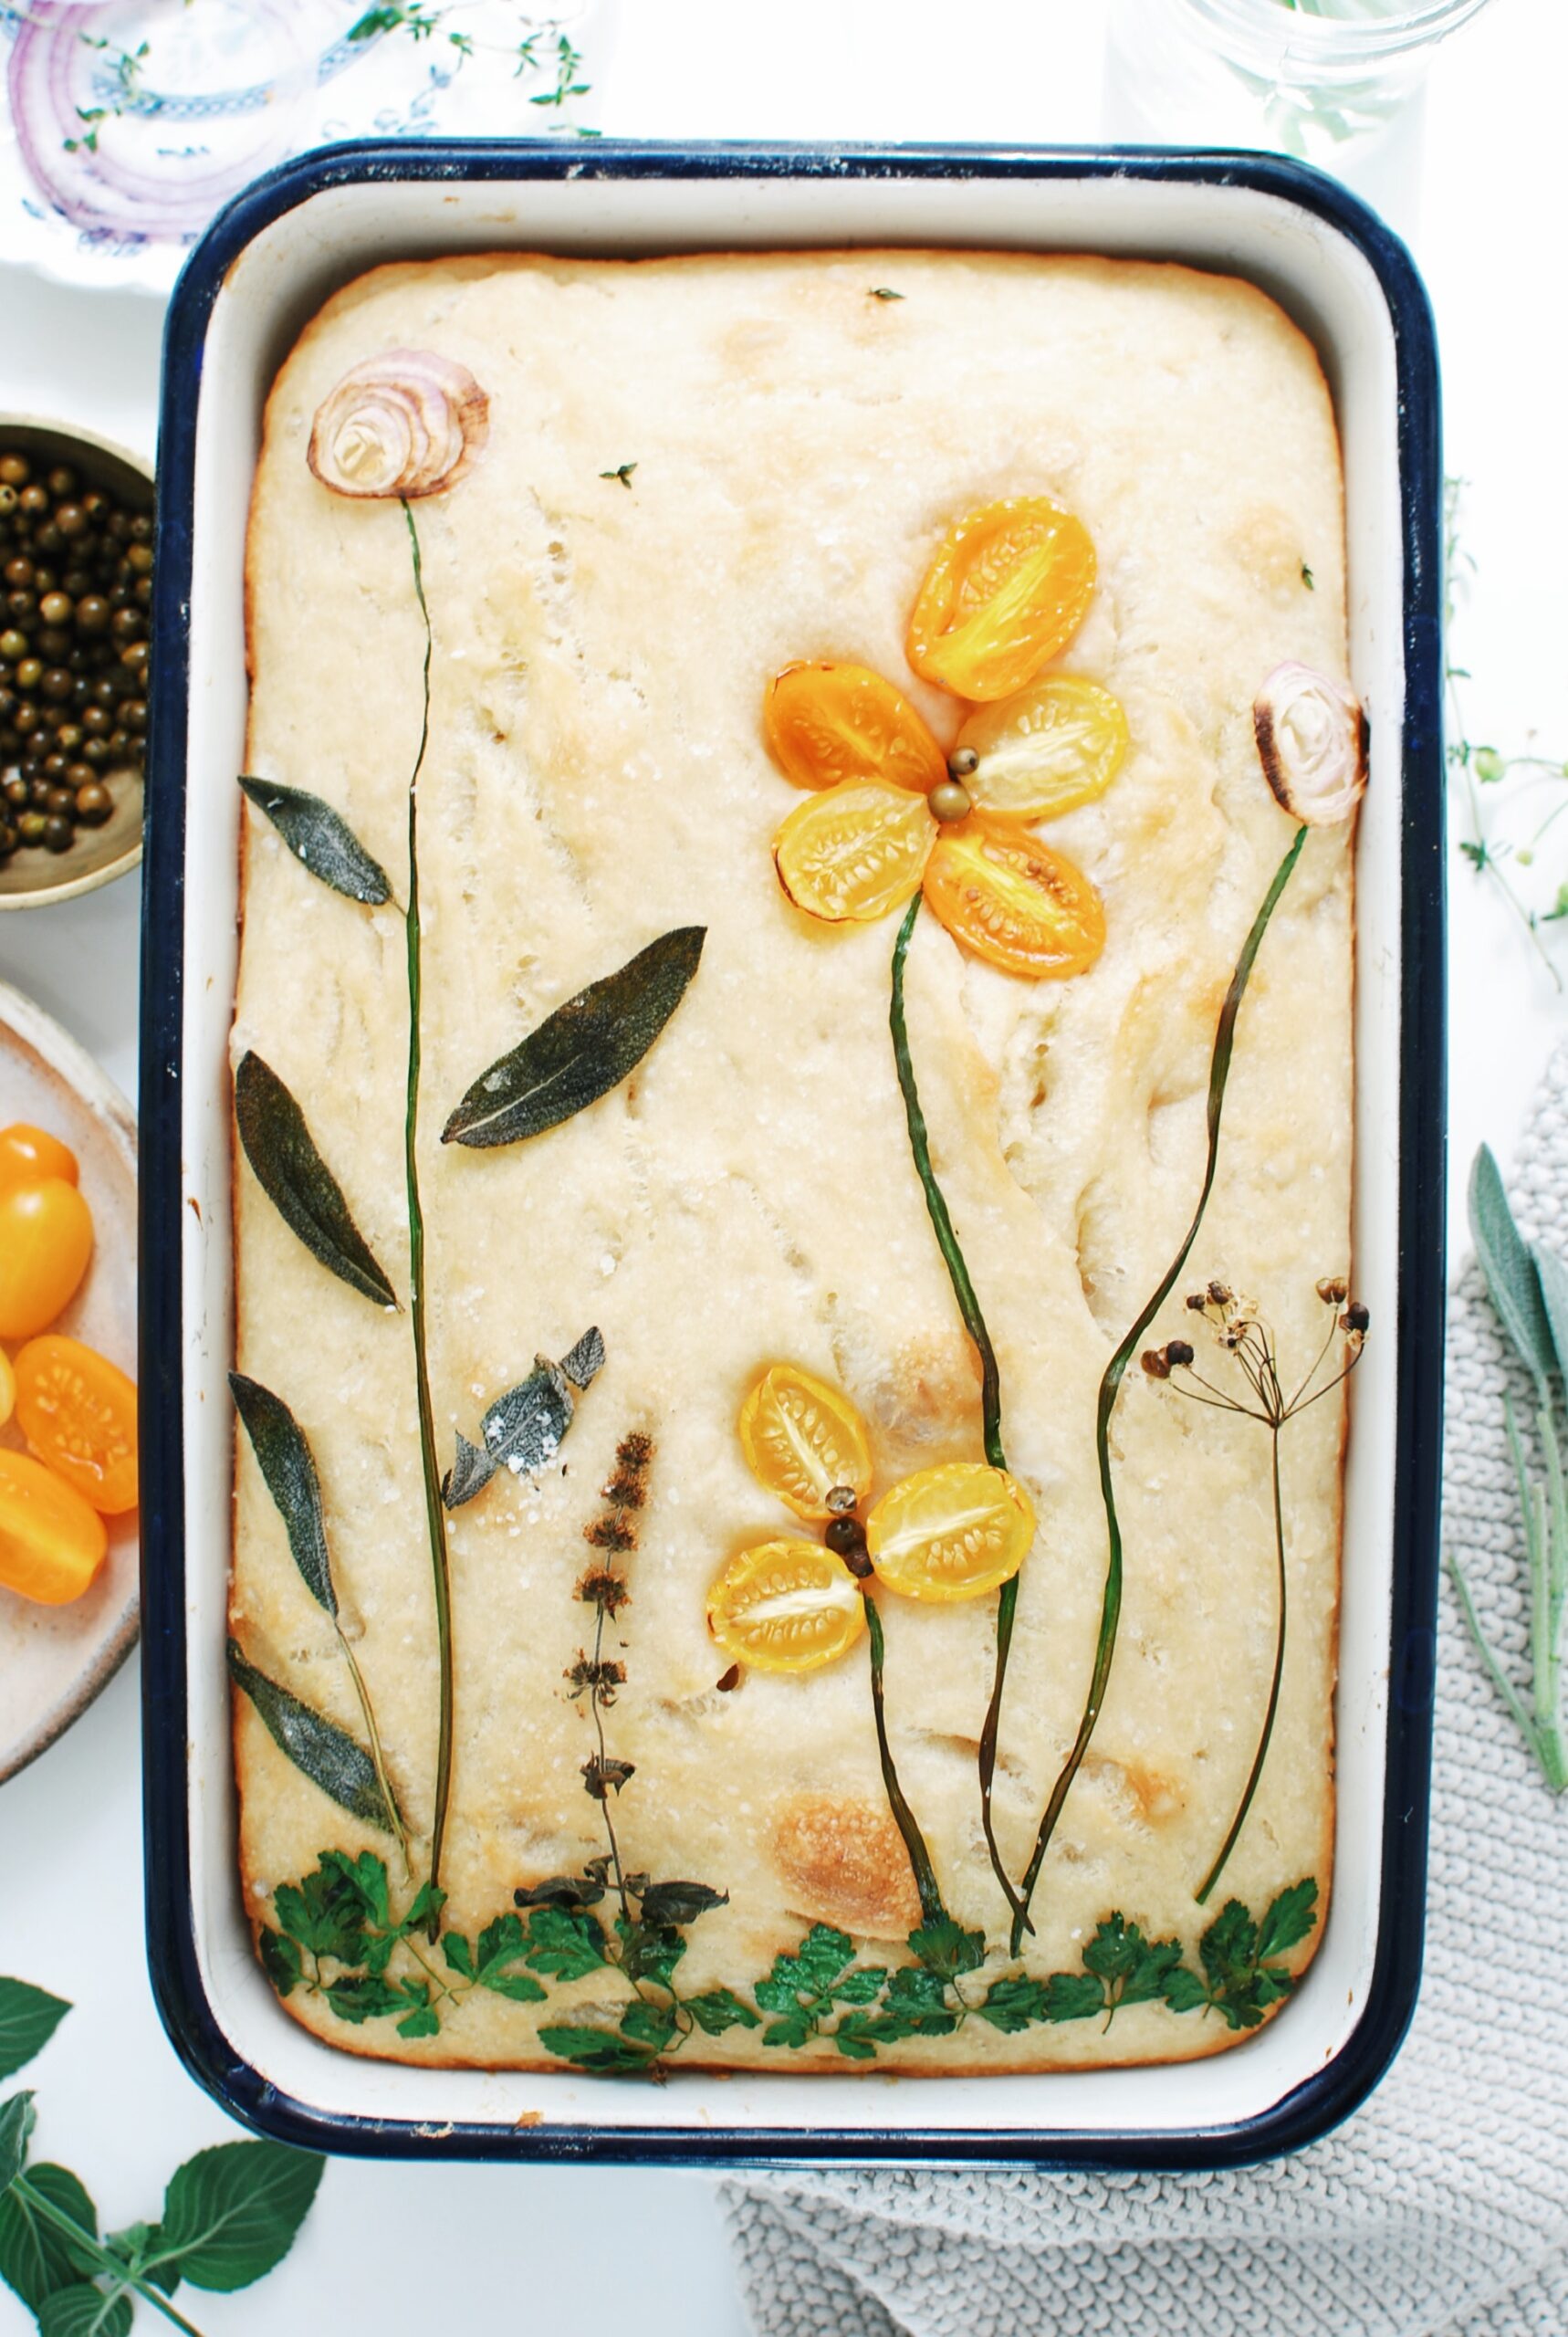
Then we just decorate! Create whatever scene strikes you. Edible flowers, herbs, halved cherry tomatoes for flowers, little thyme leaves for birdies, peppercorns or capers for the flower centers, red onion for more poppy flowers. It’s all so pretty! I’m telling you, the amount of squealing in this house has verged on criminal since last week.
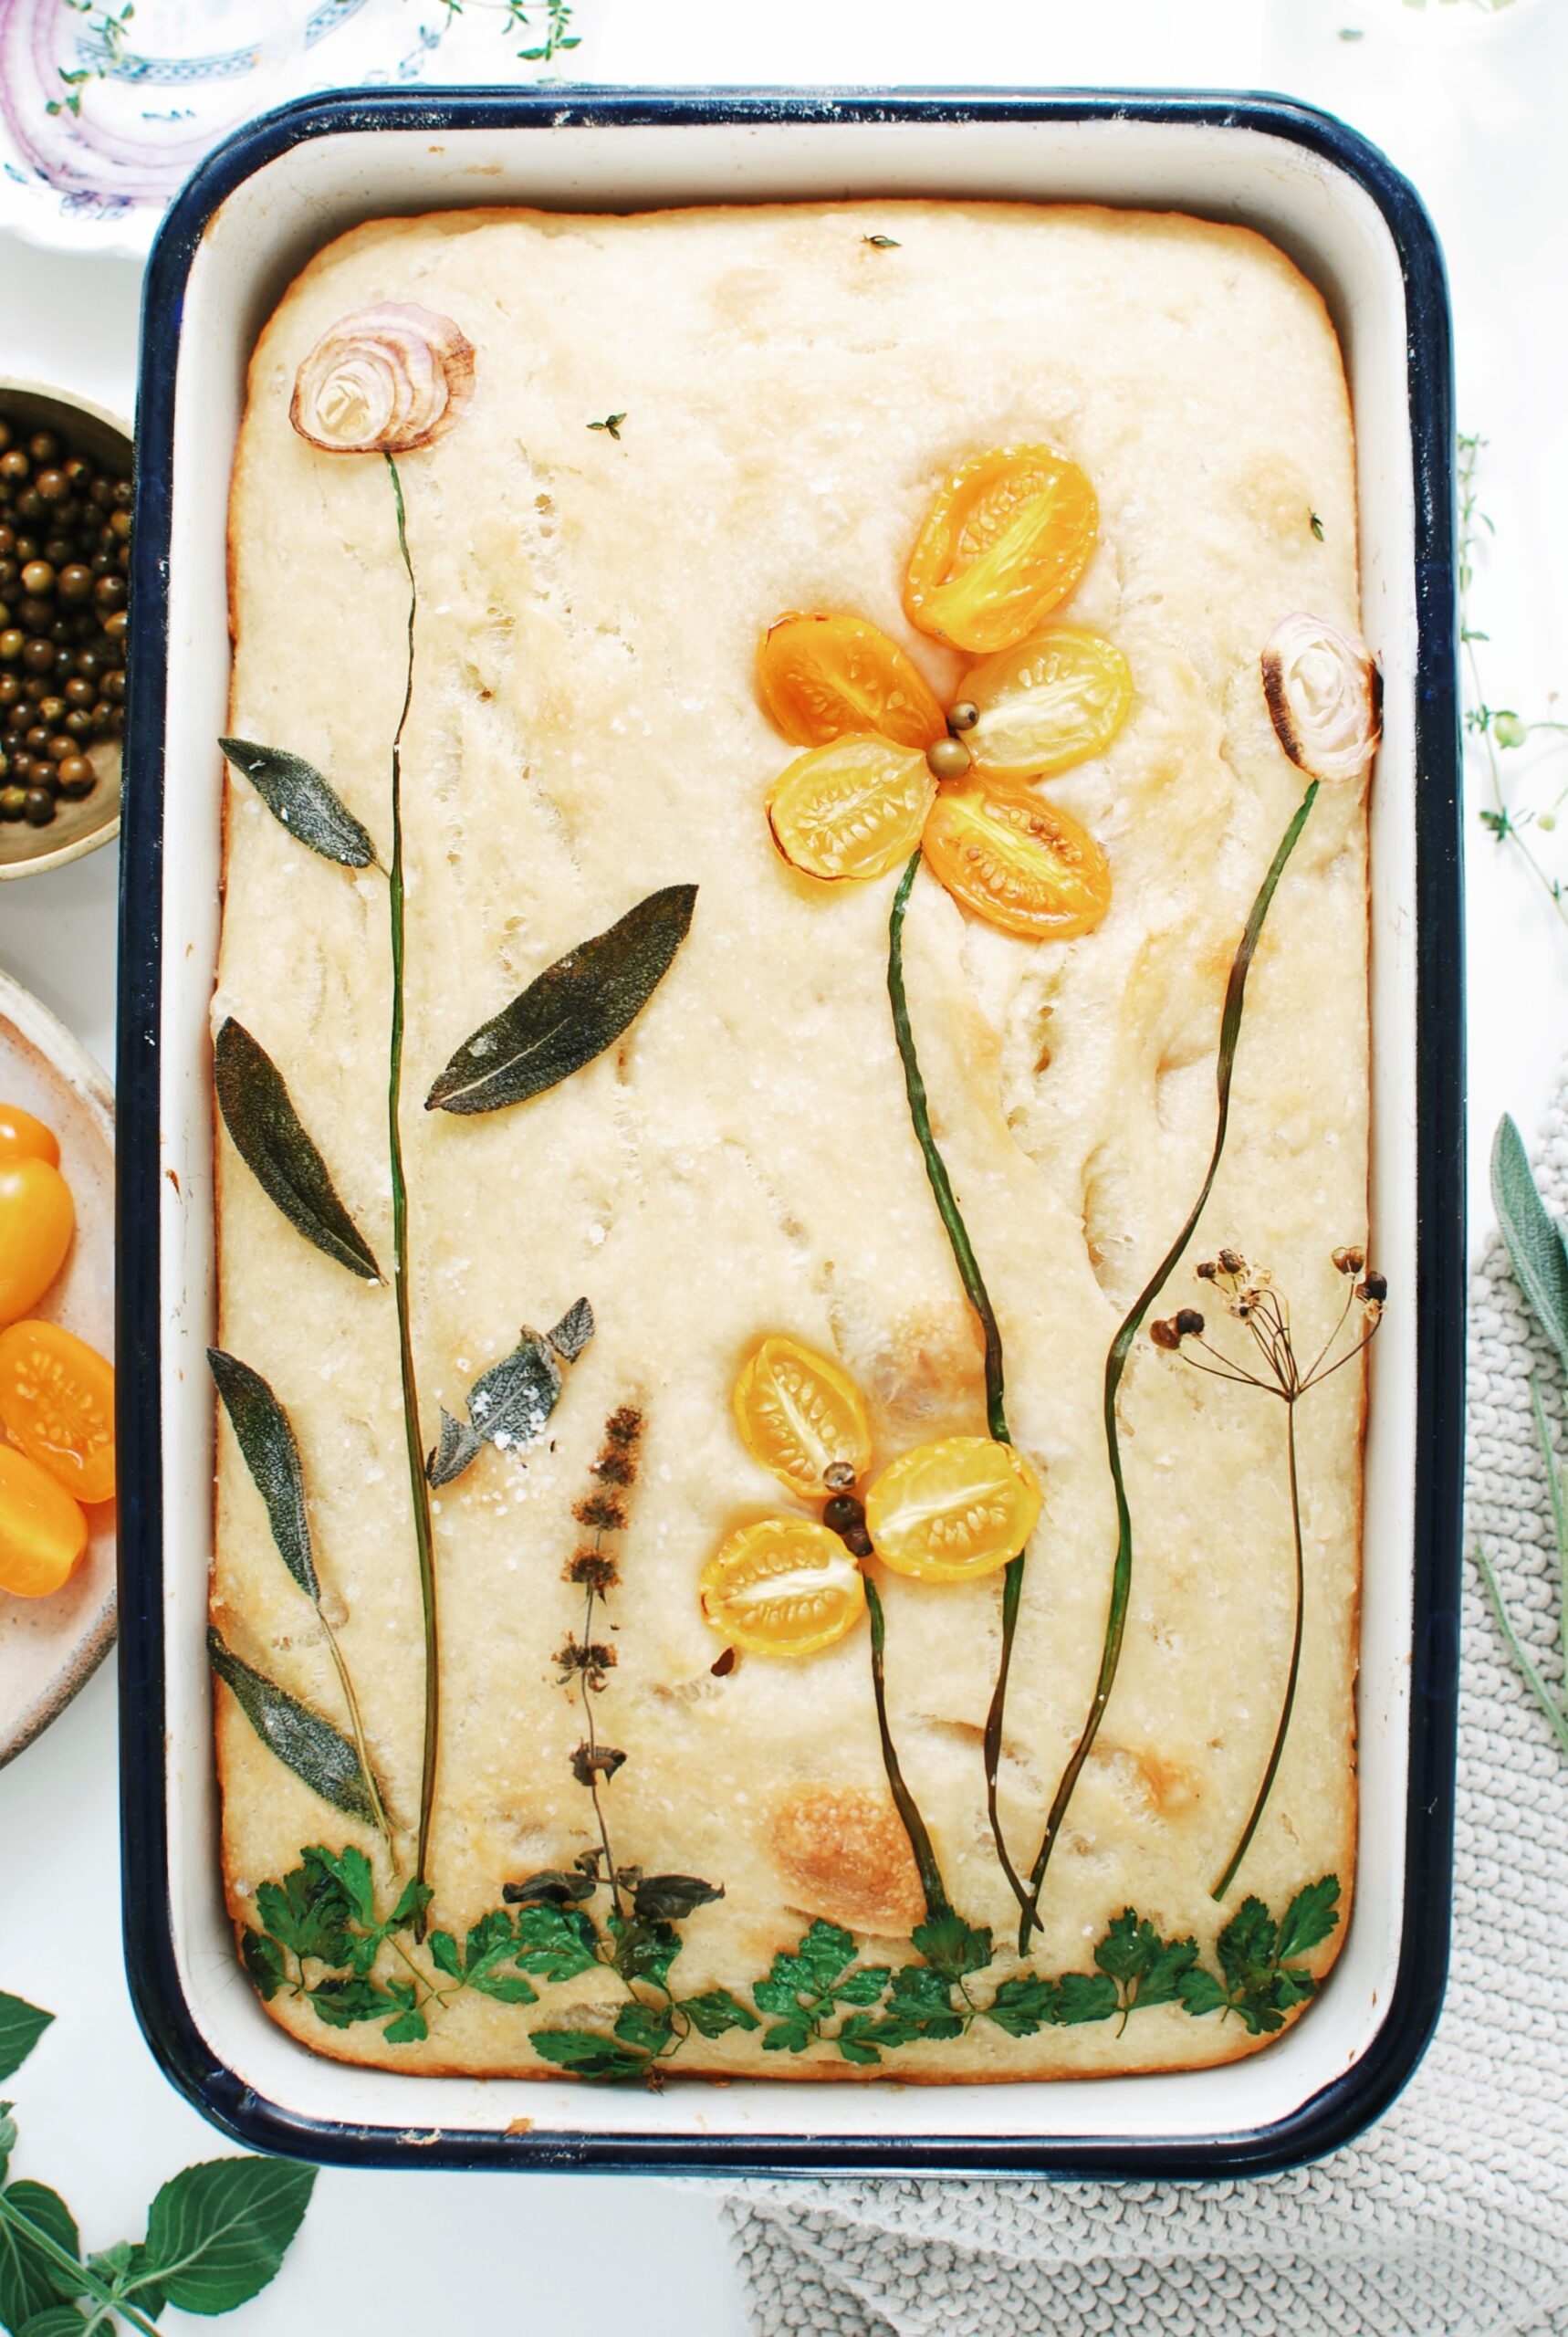
But let’s see how it bakes.
UM. DYING.
The parsley still looks the best, as far as the greens go. I’ll use more parsley next time! Chives darkened a bit, but I love the rustic look, so I’m totally in for this.
The flowers crisped up but again, not gonna get mad about. It’s @$%# bread art, for crying out loud.
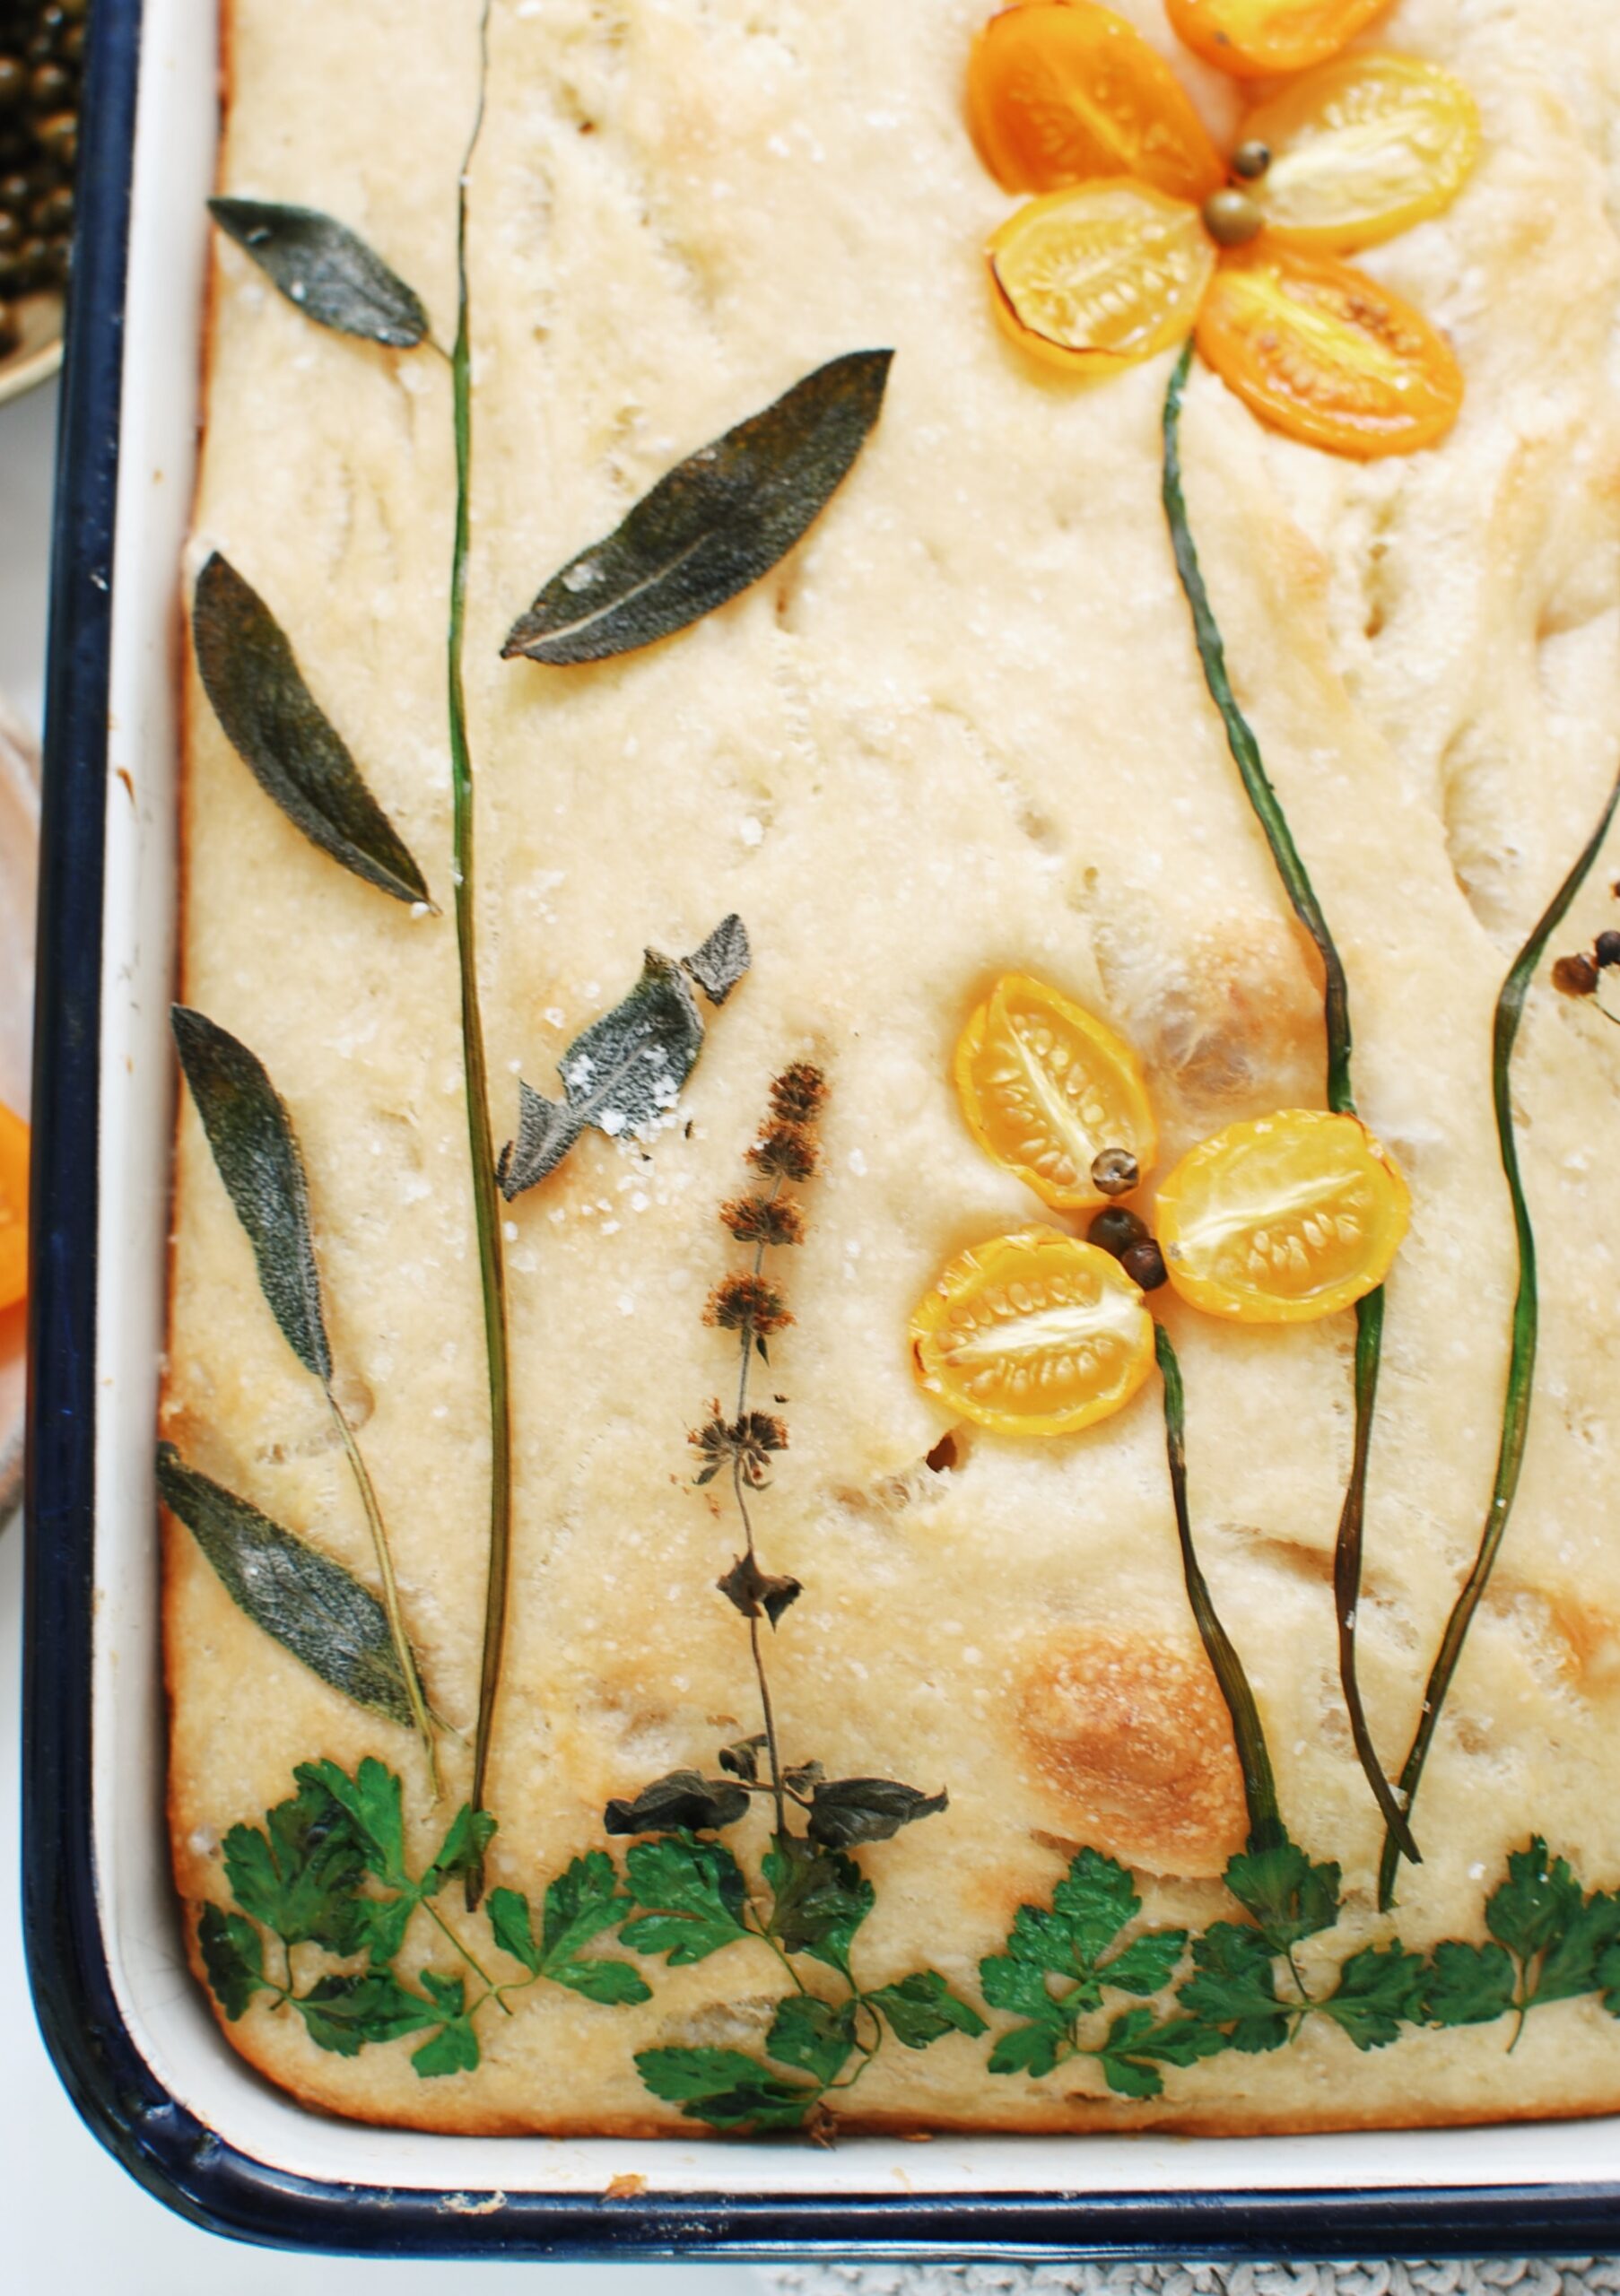
Sage crisps up quickly! Noted. And I knew that. But needed the reminder. Still super attractive!

Of course the bread expands and everything else shrinks a tad, so there’s definitely room for more art. And just look at onion. So gorgeous, so delicious.
I am falling apart over this whole thing, so promise me you’ll try it soon! I’m already planning an epic Thanksgiving bread scene to make, even though my s-i-l Carolyn doubled over in laughter when I told her. Not sure how to take that.
Make thiiiiiiiis!
 Save Recipe
Ingredients
- 3 cups bread flour
- 1/4 tsp active dry yeast
- 1 1/4 tsp coarse salt
- 1 2/3rd cup warm water
- Extra-virgin olive oil
- Cherry tomatoes, halved
- Red onion, thinly sliced
- Any herbs from the garden you have! (I used parsley, chives, sage and thyme)
- Flaky salt to garnish
Instructions
- In a large mixing bowl combine the flour, yeast and salt. Whisk until combined, then add the warm water. Using a wooden spoon, stir the dough together until it’s shaggy and wet. Perfect. Cover it with plastic wrap and a clean kitchen towel and let it sit on the counter overnight. At least 12 hours.
- Next day: Grab a casserole dish (mine was 7x12ish) and drizzle a decent amount of oil on the bottom. Uncover the bread bowl and look at that! It should be risen, bubbly and beautiful. Tip the dough out of the bowl and into the casserole dish. Spread it with your hands to fit the dish snuggly, then dimple it with your fingers and drizzle with more oil. Let this sit, lightly covered for two more hours. Then it’s time to decorate!
- Preheat your oven to 400.
- Really, anything goes. I made a little garden scene with parsley along the bottom, chives as stems, cherry tomatoes and peppercorns for flowers, thinly sliced red onion for more flowers, thyme leaves for birds, etc. Just get creative!
- Bake this for 25 minutes, until the bread has risen and golden brown. Just gorgeous.
- Let it rest a few minutes before slicing in! Garnish with a little sprinkle of your best flaky salt. Then prepare to enter a new phase of your life.
- Makes one focaccia!
And if you do, please for the love of all things holy SEND ME PHOTOS.
6 Responses to Focaccia Bread Art
Trackbacks/Pingbacks